
by Andrew Constant | Oct 18, 2023 | Cloud, Tutorials
Every couple of years Ubuntu brings out a new LTS version of its operating system and with it comes a bundle of new applications and dependencies. This can be both exciting and challenging for sys-admins who need to make everything work after an upgrade. One of the updated features in Ubuntu 22.04 is the transition from PHP7.x to PHP8.x. This brings a boost in performance, sparkling new features and longer support. To ease the pain of making the jump, we will go through the steps needed to upgrade your Ubuntu server to 22.04 and your Nextcloud to version 26 with PHP8.x. Hold on to your Bermudas and let´s jump in.
Preparation
Before we make any irreversible changes let’s prepare our system so we have a good base to come back should anything go wrong (it won’t but you never know). We will start by making sure our current server is up to date and all the packages are installed.
sudo apt update
sudo apt upgrade
sudo apt autoremove
Here would be a very good point to make a backup or snapshot of your server as we have an up-to-date working system. If anything were to happen or you make a mistake, you can always come back to this point and start again. Additionally, you should consider allowing port 1022 for later, as you are probably doing this process over SSH, more on this later. Just as a side note, we take no responsibility for lost data, so we urge you to make a backup to recover from if things go south.
Moving on to the next step we want to take note of the PHP modules we currently have installed on the server. We will need these to install the corresponding versions later. Quick tip: You don’t need to worry about php-json as it will already be included in PHP8. First of all we will list the current modules we have on our current PHP version, you can do this with the following two commands:
php -m

dpkg --get-selections | grep php

php -m
[PHP Modules]
apc
apcu
bcmath
calendar
Core
ctype
curl
date
dom
exif
…
These are all of the modules currently on the system and it´s a good idea to save this list in order to install the correct ones later. If you have already manually installed all of the modules before with the older version you can copy this command and just replace the version number. Copy it into your favourite editor and use the find and replace function to find “7.4” and replace it with “8.1”. This can be done again with future versions and saves you time typing it out every time. Now we know what modules we want to install for later let’s move onto the upgrading part.
Dist-Upgrade
Now the fun part, we will prepare to upgrade our distribution to the next version, but first we need to confirm a few things. We need to make sure that we find out what distribution version we currently are on so that we don’t skip a version. If for some reason you are still on Ubuntu 18.04 you would need to upgrade to 20.04 first before going to 22.04.
First let’s check our distribution:
lsb_release -a

No LSB modules are available.
Distributor ID: Ubuntu
Description: Ubuntu 20.04.6 LTS
Release: 20.04
Codename: focal
Great, this is our current version and we can go straight to the next step of starting the upgrade. Be aware you may need a coffee in between as a Dist-Upgrade can take some time to process depending on your system. To start the process we enter this command which starts wizard:
sudo do-release-upgrade
This will ask you a series of questions regarding the process and we will go through them now.
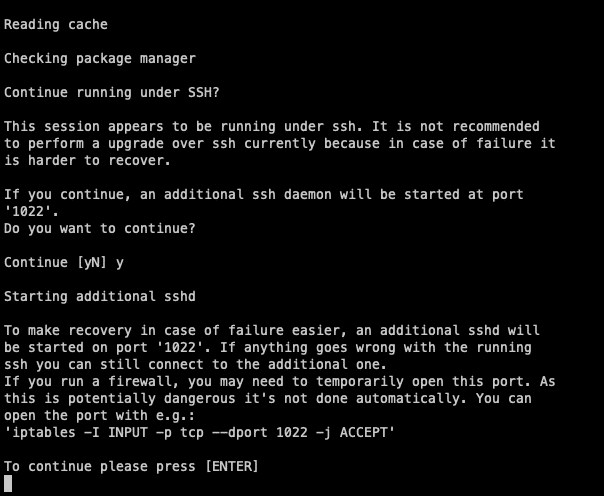
As we will likely be doing this over SSH, the wizard will ask you if you would like to run a daemon on port 1022 in case anything crashes during the process. Always accept this one as this will allow you to recover the instance over this port and continue the process. If you haven’t already done so make sure this port is free on your machine or firewall. Afterwards just hit enter to continue.
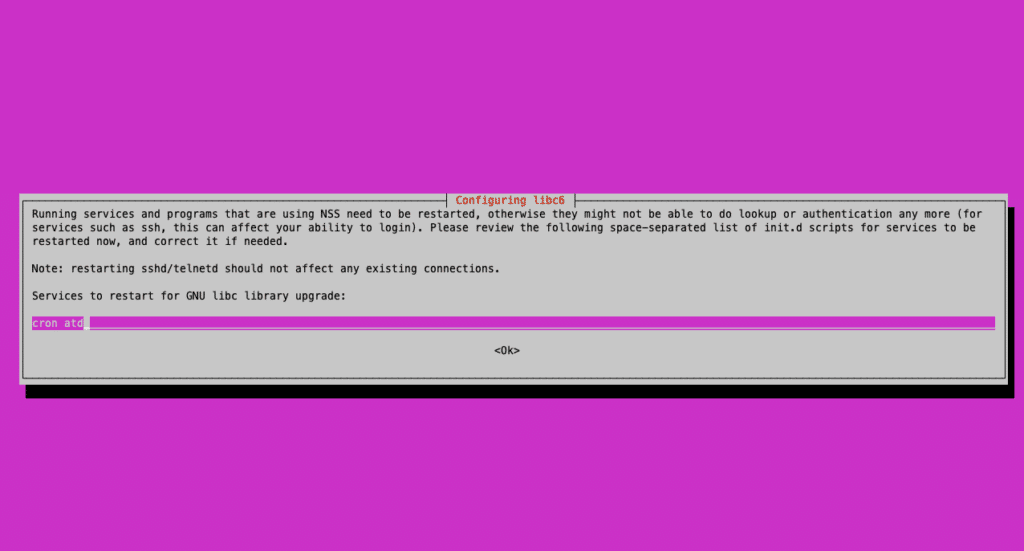

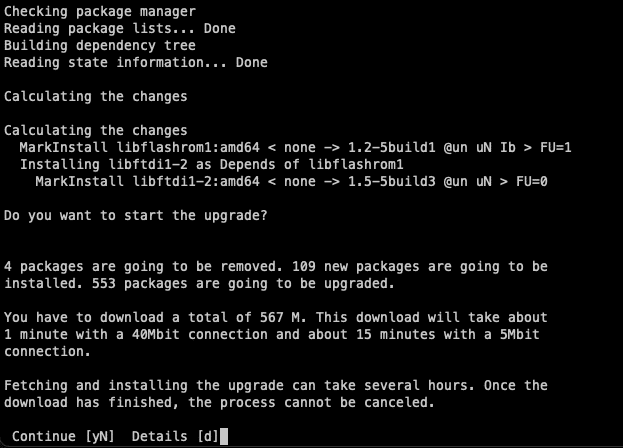
In the upcoming stages, you will be asked to confirm the installation of all the new packages for the new distribution. Naturally, we want to proceed with this, so simply agree on the next two screens as well. The first of which will ask if restarts are allowed, if you are doing a Dist-Upgrade your server won’t be reachable anyway. So whether you restart or not is irrelevant just hit enter to continue the process.
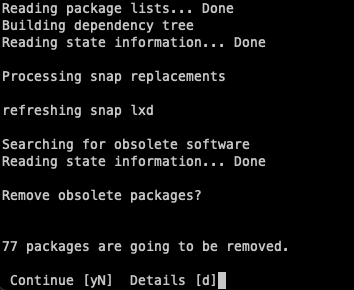
The following question will ask if you want to remove obsolete packages which are left over from the upgrade. You can go ahead and just get rid of these as they just take up space.
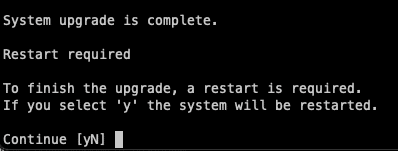
Finally, you will be asked to restart your system, and it’s always a good idea to do so right after because it will only take a minute. Now, your server has the latest version of Ubuntu and is ready to be configured for PHP.
Configuring PHP
We are now ready to set up our PHP to use version 8.1. The reason we use 8.1 first is that Nextcloud Version 25 is not compatible with versions higher than this. If you go straight to 8.2, your Nextcloud will not function as intended. If you intend to upgrade to 8.2, you will need to do it after upgrading your Nextcloud to version 26.
Since we have already performed the Dist-upgrade, it might have already installed a few modules prepared for PHP 8.1. However, we need to ensure that we install all the additional modules required for Nextcloud. If we compare our list from earlier, we need to install all the remaining modules. In general, you will need the following:
sudo apt install php8.1-gd php8.1-mysql php8.1-curl php8.1-mbstring php8.1-intl php8.1-gmp php8.1-bcmath php-imagick php8.1-xml php8.1-zip
Now we can deactivate the old PHP version (if it’s not already done) and ensure that the newest version is activated.
a2dismod php7.4
a2enmod php8.1
We can also use this command to set the default PHP version, ensuring it will always be used unless specified otherwise. We have the option to either leave it as the default or force it to always prefer our selected version. This however only has an effect on the PHP commands you use on the CLI and is not app specific.
update-alternatives --config php

The last thing we need to do with PHP is change some of the standard settings for Nextcloud. These can be found here:
vim /etc/php/8.1/apache2/php.ini

memory_limit = 512M
upload_max_filesize = 500M
post_max_size = 500M
Make sure you restart your services so that all of the configurations take effect and you will be good to go.
systemctl restart apache2
From here, you can proceed to install Nextcloud 26 using the built-in installer and complete the update in a matter of minutes.
Conclusion
And there we have it! Your server is now up to date and ready to take on the world. It’s always recommended to keep your system up to date with the latest versions to benefit from security updates, improved performance, and new features for your applications. With Nextcloud, there are numerous ways to enhance your setup, not limited to PHP versions. Exploring Nextcloud hardening is also a worthwhile endeavor and will be covered in our upcoming series of blog posts. So, stay tuned for the next update from us!
Need help with this topic? Feel free to send us a message or subscribe to our newsletter for more content on the topic.

by Andrew Constant | Jun 16, 2023 | Cloud, Tutorials
Many of you may already be familiar using Terraform with Azure or AWS. Although these may be the most used platforms, there is still a need for variety of other options due to local regulations (GDPR). As our systems are geared towards Open-Source, we will be looking at using Terraform with OpenStack. We try and integrate all of our services with OpenStack and make tutorials along the way to help the community too. Combining the power of Terraform with OpenStack you can get started right away with deploying servers at will. This tutorial will guide you through the first steps of using Terraform with an OpenStack project, let’s get going!
Understanding Terraform and OpenStack
Terraform is a fantastic infrastructure provisioning tool and in the right hands, it can change the way you deploy your resources. Terraform is relatively easy to get started with and within a few minutes we will be deploying servers in our OpenStack project. Terraform is declarative, what means that you define the end result and let Terraform figure out the rest for you. OpenStack is a great Open-Source cloud provider with lots of features that are widely accessible to a lot of applications.
Both of these tools are free and don’t require a purchase. You will only have to pay for the servers costs, which are by the way a lot cheaper at NETWAYS Web Services compared to other providers.
Installing Terraform
We are going to assume that you already have an OpenStack project and will focus more on the setup of of Terraform rather than OpenStack. For those of you that are also haven’t installed Terraform yet here is a quick guide to getting it installed on your computer.
If you are on macOS you are in luck, you will just need the following two commands to get started:
brew tap hashicorp/tap
brew install hashicorp/tap/terraform
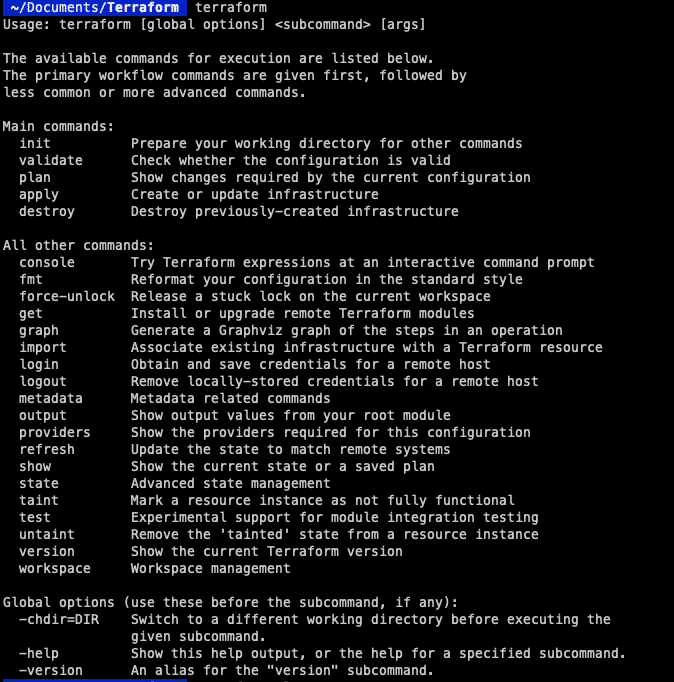
This will install the repository and everything you need to get started. To make sure everything works you can enter “terraform” into the console to see if you get a response.
If you are on Linux however you will need a few more commands to get up and running. We will start by adding the GPG Key to the system:
wget -O- https://apt.releases.hashicorp.com/gpg | gpg --dearmor | sudo tee /usr/share/keyrings/hashicorp-archive-keyring.gpg
Now we can add the HashiCorp official repository.
echo "deb [signed-by=/usr/share/keyrings/hashicorp-archive-keyring.gpg] https://apt.releases.hashicorp.com $(lsb_release -cs) main" | sudo tee /etc/apt/sources.list.d/hashicorp.list
Now we are ready to update the server and install Terraform.
sudo apt update
sudo apt install terraform
Here we can also check with the “terraform” command like before to see if everything is installed correctly. Terraform is installed and we are ready to start with the next step, authentication to allow us to communicate with OpenStack.
Configuring Terraform
With all Terraform environments we will need a file called “main.tf”. This will configure the cloud provider we want to use, including the servers we want to spin up and the modules we want to include (more on this in following tutorials). First of all you might want to create your own directory for Terraform but that is up to you.
mkdir terraform
cd terraform
vim main.tf
Here is my “main.tf” file and this is what the configuration part looks like
terraform {
   required_version = ">= 0.14.0"
   required_providers {
      openstack = {
         source = "terraform-provider-openstack/openstack"
         version = "~> 1.48.0"
      }
   }
}
provider "openstack" {
   auth_url = "https://cloud.netways.de:5000/v3/"
   user_name = "1234-openstack-56789"
   password = "supersecretpassword"
   region = "HetznerNBG4"
   user_domain_name = "Default"
   tenant_name = "1234-openstack-56789"
}
This is the basic setup that you will need in order to “talk” to your Openstack provider. At the top we will define the versions we want to use for Terraform and OpenStack. The “provider” section will be the authentication you will need to communicate with OpenStack. A lot of this information can be found in your project under API Access and clouds.yaml. This will include some of the following:
auth_url – The URL of your OpenStack provider
user_name – The user of your project
password – Password for this project
region – This is where your provider is located also in your clouds.yaml file
user_domain_name – This is usually “Default”
tenant_name – This is not in the clouds.yaml file but for me this was the same as my project name.
Alternative Configuration
As it is not possible to connect your My-NWS to terraform with Keycloak, we will have to use a different method. This is a little different and here we will need to download our OpenStack RC and create an application credential.
Here you can download your RC config and then use it to control your project.
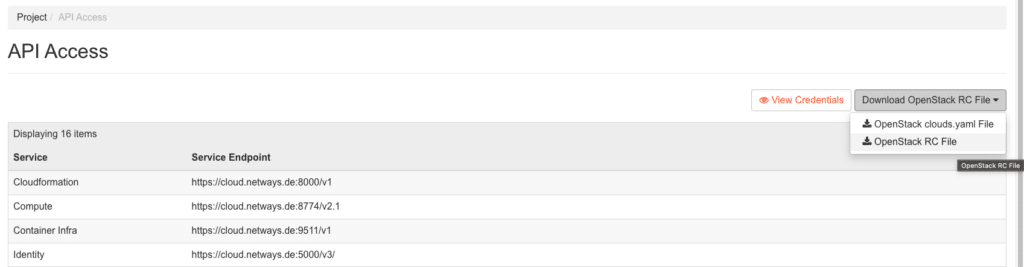
source your-RCfile
Enter your credentials here and then insert the following command to create a resource. You can name this whatever you want but to make things easier we will just call it “terraform”. This secret is only shown once. So if you have a habit of misplacing things, it might be a good idea to make a copy of it.
openstack application credential create terraform
+--------------+----------------------------------------------------------------------------------------+
| Field        | Value                                                                                  |
+--------------+----------------------------------------------------------------------------------------+
| description  | None                                                                                   |
| expires_at   | None                                                                                   |
| id           | d02db6c5f165f44fe558g854gee1df6b                                                       |
| name         | terraform                                                                              |
| project_id   | 7f156c15865vv1b2165b516b7f52bc67                                                       |
| roles        | _member_                                                                               |
| secret       | supersecretpassword                                                                    |
| system       | None                                                                                   |
| unrestricted | False                                                                                  |
| user_id      | 5bee123b379c101f1c9fb37af5wf4f85g41rgg515584384459e59b707088e77e                       |
+———————+-----------------------------------------------------------------------------------------------+
Now we have permission to access our Openstack without having our password being visible. We can add this to our “main.tf” file and it should look something like this:
provider "openstack" {
  auth_url     = "https://cloud.netways.de:5000/v3/"
  region       = "HetznerNBG4"
  user_domain_name  = "Default"
  tenant_name  = "1234-openstack-12345"
  application_credential_id     = “your-id-goes-here“
  application_credential_secret = “your-secret-goes-here“
}
Now that the authentication side of things is sorted we can run the next command to initialise everything. In the directory “terraform” we can run this command:
terraform init
This is required as although we have installed Terraform, it doesn’t collect code for all providers and that is what we will do now, to get all we need for OpenStack. Now we are able to talk to our project, we can start building some infrastructure and get our resources running! For this example we will just be starting a server with a default flavour and SSH key. Here is my configuration for both resources:
resource "openstack_compute_instance_v2" “example-server" {
   name = "terraform-test"
   flavor_name = "s1.small"
   image_name = "Ubuntu Jammy 22.04 LTS"
   security_groups = [
      "HTTP",
      "SSH"
   ]

   network {
      name = "6801-openstack-ca070"
   }

   key_pair = "ssh"
}
Now this is a very simple setup to get us started and we will go through the necessary parts.
Other Necessities
The first part is the resource or server that we want to create. Make sure to align the values you are putting in with the values in your project, otherwise it will fail to create the instance correctly. The security groups I used were already in my project as I had configured those for a previous project. Underneath is my SSH key so that I am also able to connect to the server afterwards as this needs to be done when creating the server.
Here is my complete configuration for setting up the cloud provider and server I want to deploy:
terraform {
   required_version = ">= 0.14.0"
   required_providers {
      openstack = {
         source = "terraform-provider-openstack/openstack"
         version = "~> 1.48.0"
      }
   }
}

provider "openstack" {
   auth_url = "https://cloud.netways.de:5000/v3/"
   user_name = "1234-openstack-56789"
   password = "supersecretpassword"
   region = "HetznerNBG4"
   user_domain_name = "Default"
   tenant_name = "1234-openstack-56789"
}

resource "openstack_compute_instance_v2" “example-server" {
   name = "terraform-test"
   flavor_name = "s1.small"
   image_name = "Ubuntu Jammy 22.04 LTS"
   security_groups = [
      "jitsi",
      "SSH"
   ]

   network {
      name = "6801-openstack-ca070"
   }

   key_pair = "ssh"
}
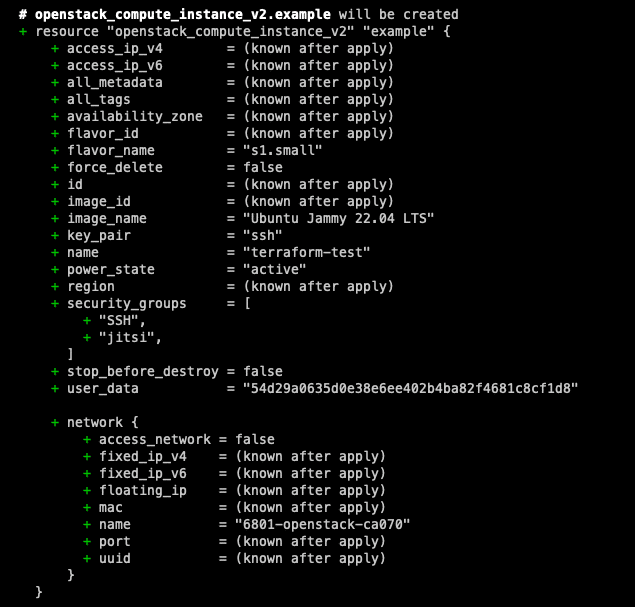
Now we have our configuration setup we can do a dry run to see what changes will be made. Although you will be asked before you actually apply the changes, it is always good practise to try the configuration first. This will allow you to check your code before it is deployed. The graph that comes with the command is very similar to git, it shows you ‘+’ and ‘-‘ for what will be changed. This way you get a clearer view of what will change before you do it for real.
terraform plan
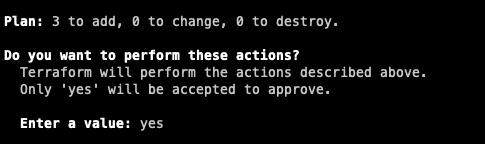
Once you are happy with the changes and there aren’t any errors you can go ahead and run the next command to actually apply the changes. You will see that you will also get a similar screen like the “plan” command , but with the option of either confirming the changes or cancelling.
terraform apply
Once you are finished with the setup and you no longer need it, you can clear your resources afterwards with the following command. Be careful, this will remove the configuration and if there are more people working on the machine, they suddenly won’t be able to!
terraform destroy
Summary
And there you have it! Your first steps into the world of provisioning with OpenStack are complete. Although what we have achieved here is rather small, see it as a window of opportunity for the possibilities that are to come with your future projects as well. With Terraform’s declarative approach and OpenStack’s flexibility, provisioning and managing infrastructure resources becomes efficient and accessible. But it doesn’t stop there, stay tuned for more updates with Terraform as we dive into some more detailed configurations to use with OpenStack.
Get started with your own project by using our OpenStack cloud and if you ever find yourself in a pickle, one of our MyEngineers will always be there to help.

by Andrew Constant | Jun 2, 2023 | Cloud, Tutorials
For those of you that may not be too familiar with Ansible, it is a great tool to get started in the world of automation and making your life with configuration management a whole lot easier. In this tutorial we will be going through a basic playbook that you can use with OpenStack and looking into the use of dynamic inventories.
Getting to know each other
Dynamic inventories are great as you don’t need to update the file every time you set up a new server in your project. When using Ansible with OpenStack, you can utilize a dynamic inventory plugin to generate a list of servers running in your OpenStack environment. The plugin works by connecting to the OpenStack API and collecting information about instances that match specific criteria, such as those with a particular tag or running a certain image.
By using a dynamic inventory, you can streamline the process of discovering and managing hosts in your environment without needing to manually update a static inventory file. This is especially useful in larger or more dynamic environments where the number of hosts is constantly changing.
The only requirements for this tutorial are a basic knowledge of Ansible and OpenStack and even if you are a total beginner, you should still be able to get the gist of what we are trying to accomplish. We will be using the servers my project in the demonstration, but realistically it could be any number of servers to your liking. For this example we will be just checking the uptime of all of our servers. So let’s get started!
The main two components we will need are Ansible (of course) and the OpenStack SDK in order to control the API.
Caution! Depending on your system you may need to use “pip3” as pip will refer to “pip2” which is no longer in use.
First of we will install Ansible using pip from python. Let’s check to see if pip is installed.
python3 -m pip -V
If you get the message “No module named pip” then you can install it using these commands:
curl https://bootstrap.pypa.io/get-pip.py -o get-pip.py
python3 get-pip.py --user
And afterwards you can install Ansible.
curl https://bootstrap.pypa.io/get-pip.py -o get-pip.py
python3 get-pip.py --user
We can check to see if it has been installed correctly with this command.
ansible —-version
Now that we have Ansible installed we can move onto the OpenStack SDK. Now we definitely have pip installed we can use the following:
pip install openstack
Moving in together
Now that we have both programs and the plugin installed we can move onto to writing a simple playbook. This playbook as previously mentioned with be very simple and we will just be checking the uptime of the servers. Obviously you can make this a lot more complex or add your own playbooks, but the principle it the same. We will need the following files in our folder where we will be running the Ansible code.
clouds.yaml
This file is where all of our login credentials for OpenStack are, Ansible will need this in order to gain access to our project. You can obtain this by downloading the file from your OpenStack, this is what mine looks like:
clouds:
  openstack:
    auth:
      auth_url: https://cloud.netways.de:5000/v3/
      username: “openstack-user"
      password: “super-secret-password“
      project_id: 12495myproject-id65684
      project_name: "1234-openstack-15def5"
      user_domain_name: "Default"
    region_name: "HetznerNBG4"
    interface: “public"
    identity_api_version: 3
ansible.cfg
Here I have included a server that acts as a jumphost and a user that will be used once trying to connect to our servers.
[defaults]
ansible_ssh_common_args='-o ProxyCommand="ssh -W %h:%p user1@jumpserver"'
remote_user=ubuntu
openstack.yml
In this file we state the plugin we are using and what variables we want to include, like “private: false” makes sure that we are using public IP addresses. This also links our cloud.yaml file as well so we don’t need to include it in our command.This is the file I used:
---
plugin: 'openstack.cloud.openstack'
expand_hostvars: yes
fail_on_errors: yes
all_projects: false
private: false
clouds_yaml_path: ["./clouds.yml"]
playbook.yaml
This is the simple playbook that I used to just get the uptime of all of my servers.
---
- name: Print uptime of servers in OpenStack project
  hosts: all
  gather_facts: no
  tasks:
    - name: Print server uptime
      command: uptime
      register: uptime
    - debug: msg="{{ uptime.stdout }}"
Now we have everything ready it is time to run our playbook and check the output.
ansible-playbook -i openstack.yml playbook.yml
Honeymoon
Now the playbook has finished running we can check to see if it has worked correctly. We should see the results like above printed out on the terminal. If your playbook is a lot more complex and fails, you can just your error messages and see where it went wrong. That is the great thing with Ansible, you can run the playbook as many times as you like and you will get the same result. This is otherwise known as idempotent.
Although this is a very basic tutorial of the possibilities of a dynamic inventory, you can quite easily apply this to a lot more complex playbooks. If your project has 100 servers, this would be ideal as you don’t need to manually write each server into the config. Also by smaller projects this is helpful when you destroy old servers and set-up new ones, as you won’t have to retype the details of the new servers.
If you would like to find out more about IaaS or more tutorials about various other Dev-Ops topics why not check out our blogs and other posts here. Getting started with your own setup couldn’t be easier, one of our MyEngineers would be happy to help make your project ideas come to life.
Recent Comments