
Start a project and create the first server
We are celebrating successes with our new OpenStack environment – performance, stability, flexibility and favourable prices are convincing our customers. However, the multitude of functions overwhelms some users when they first start using it. We are happy to help shed light on this and show how easy it actually is.
To begin with, we need a NWS account. This can be created free of charge at https://nws.netways.de. All you have to do is enter an email address and the desired password, as well as whether you want a business or standard account. A short time later, a validation link is sent by e-mail. After confirming the account, you can already log in. A demo credit card is stored for the quick start, but it is advisable to store the desired payment method (credit card/invoice/PayPal) via the account tile on the upper left -> “Edit payment”.
Now, under the account tile “Edit profile”, we enter our desired billing data, email address for sending the invoice, etc. and validate our account via phone call or SMS.

Finally, the click on “Start app now” brings us to our goal – here you just have to follow the OpenStack button and confirm the unpopular clauses on terms and conditions and data protection – but what has to be, has to be.
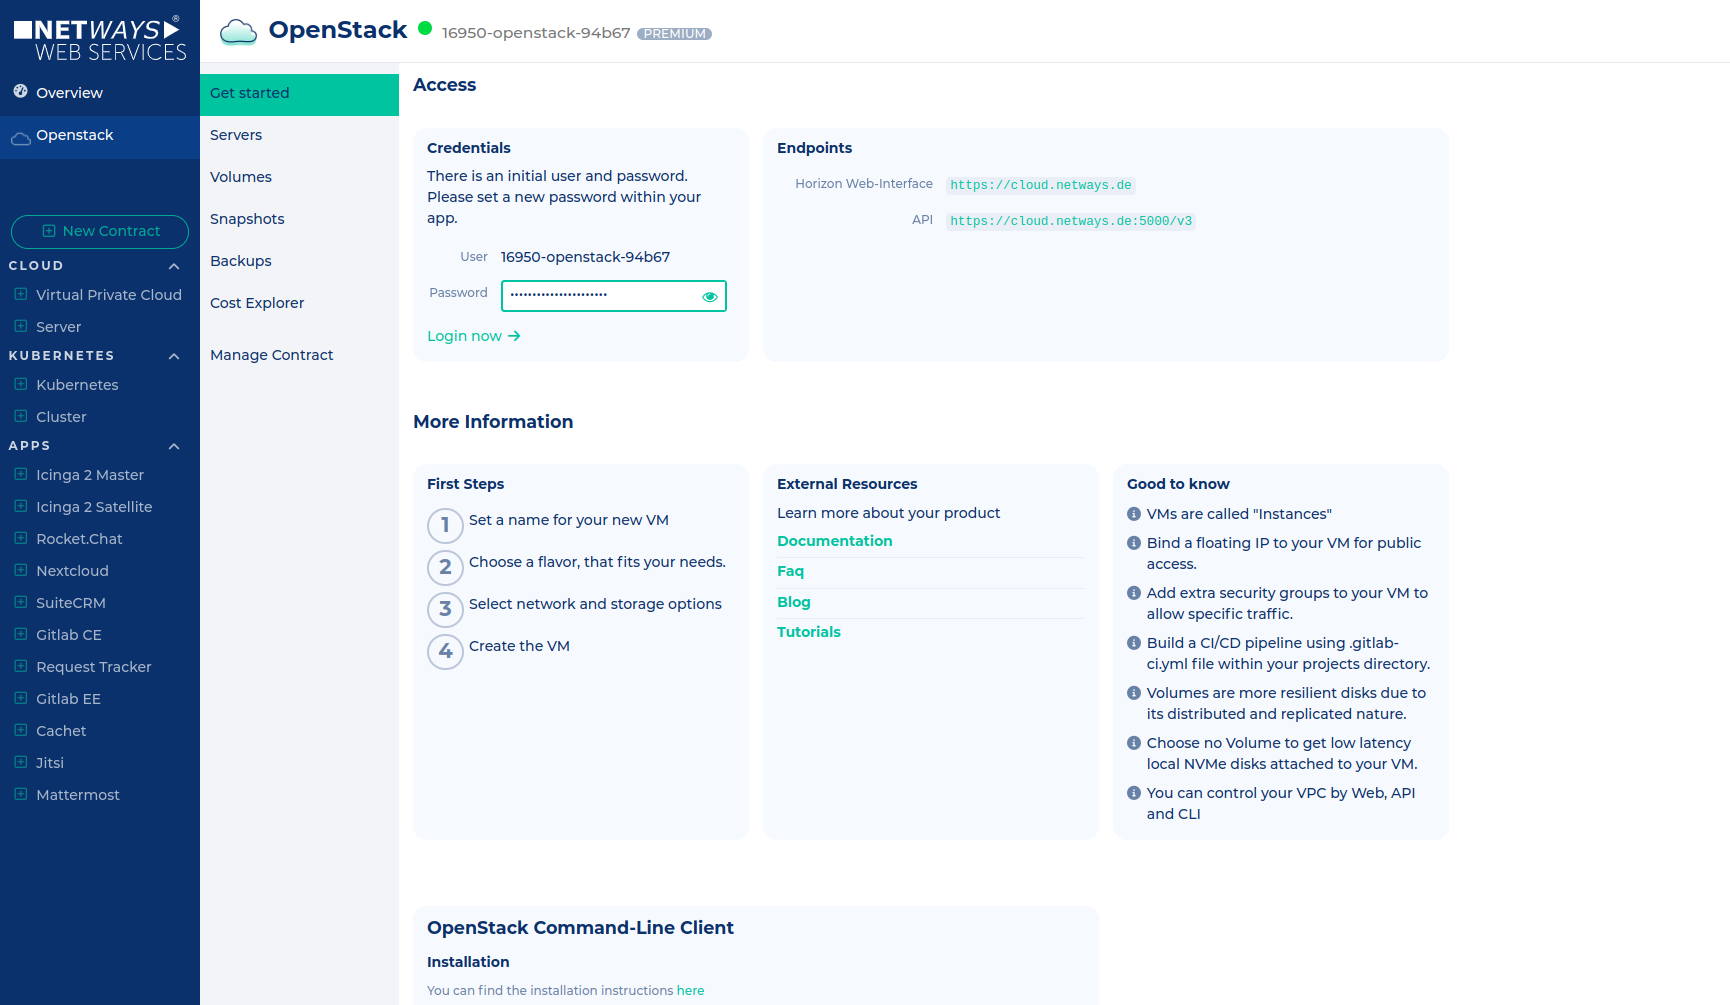
Now our App overview shows our OpenStack. Just one click away, behind the inconspicuous tile, you will find all the important information you need to get started.
Since we got a new NWS frontend, you could use the “Servers” button to create a vm very easily in one step. But this article is about OpenStack, so we go on.

After a click on the web interface link the OpenStack login window appears. The login details herefore differ from those, which grant access to NWS, but can be extracted from the OpenStack app details.
So we now insert the data we have spotted. Our OpenStack application is available via https://cloud.netways.de.
That’s it – our OpenStack is ready and waiting for the first server to be created.
Start the first machine
Don’t worry – this is also almost as easy.
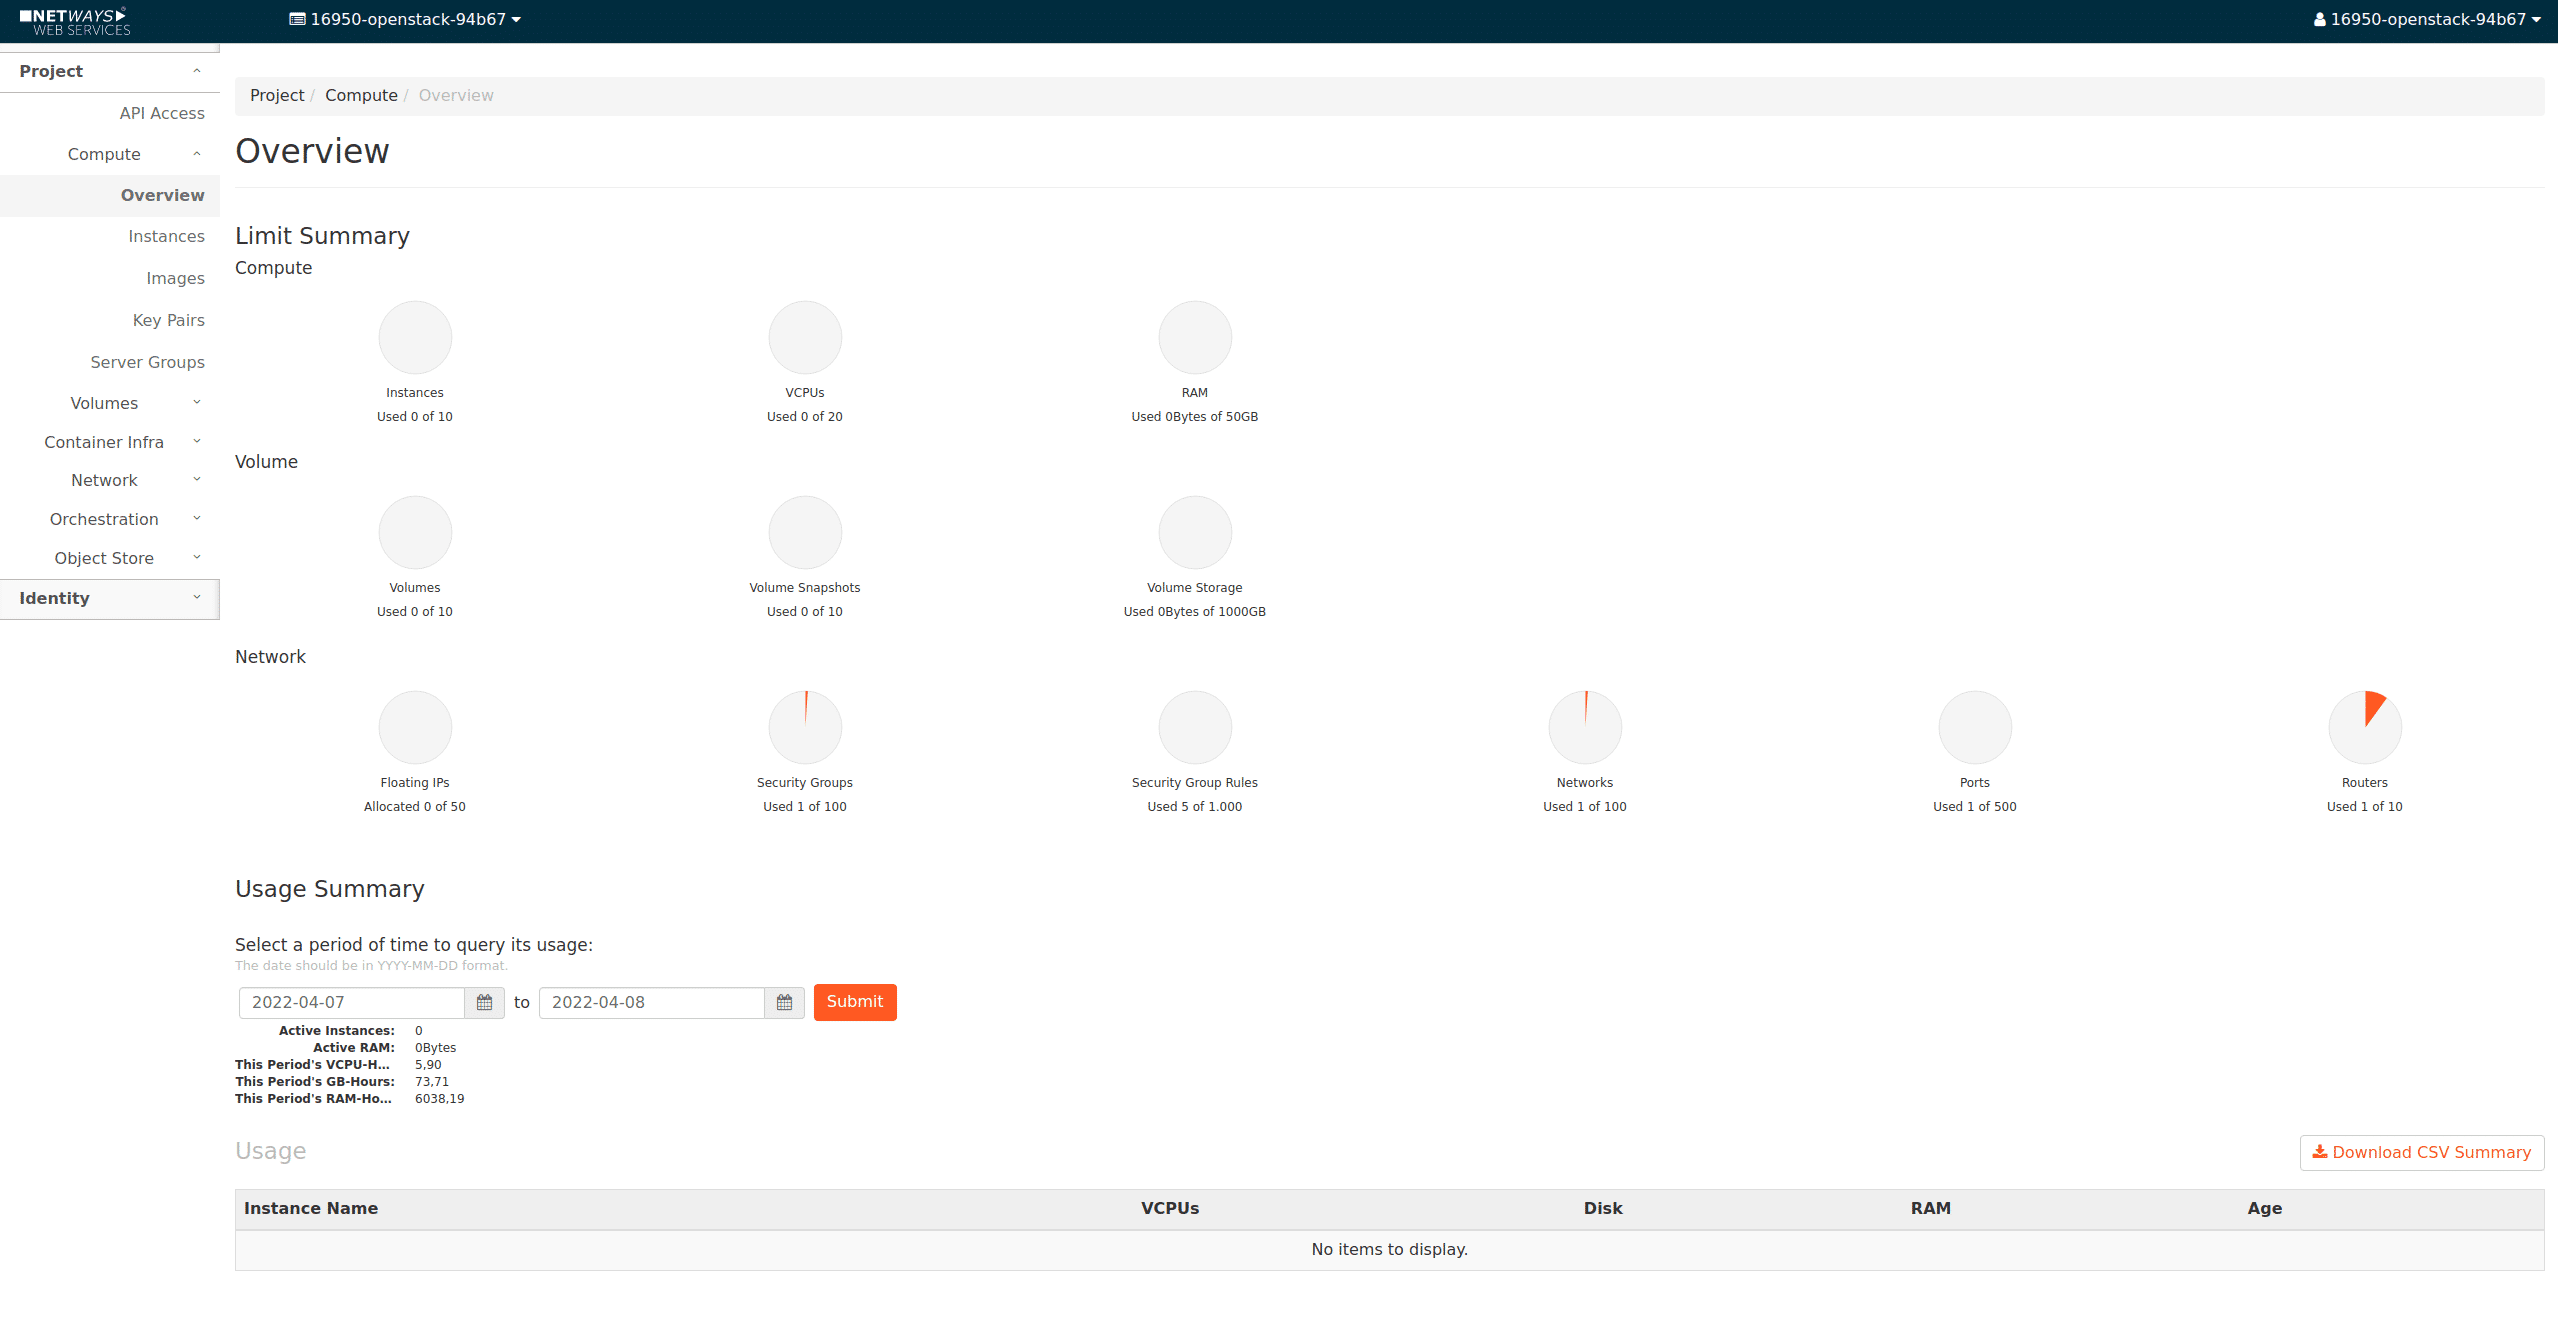
Let’s navigate to “Compute”-> “Instances” and start a new instance in the upper right corner.
![]()
In the first step we assign a name for our instance.
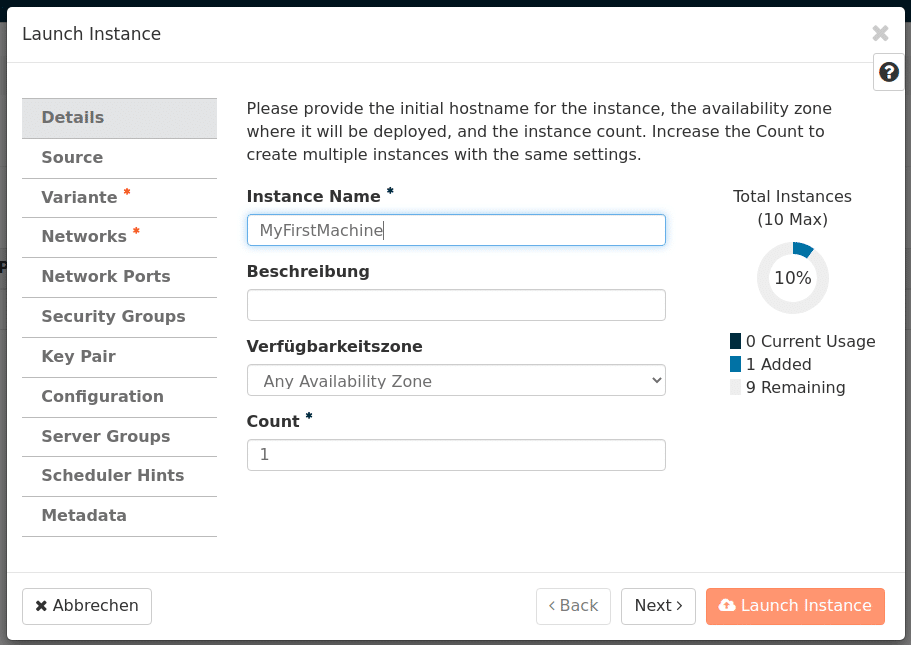
Now we work through the other tabs on the left and check the “Source” tab.
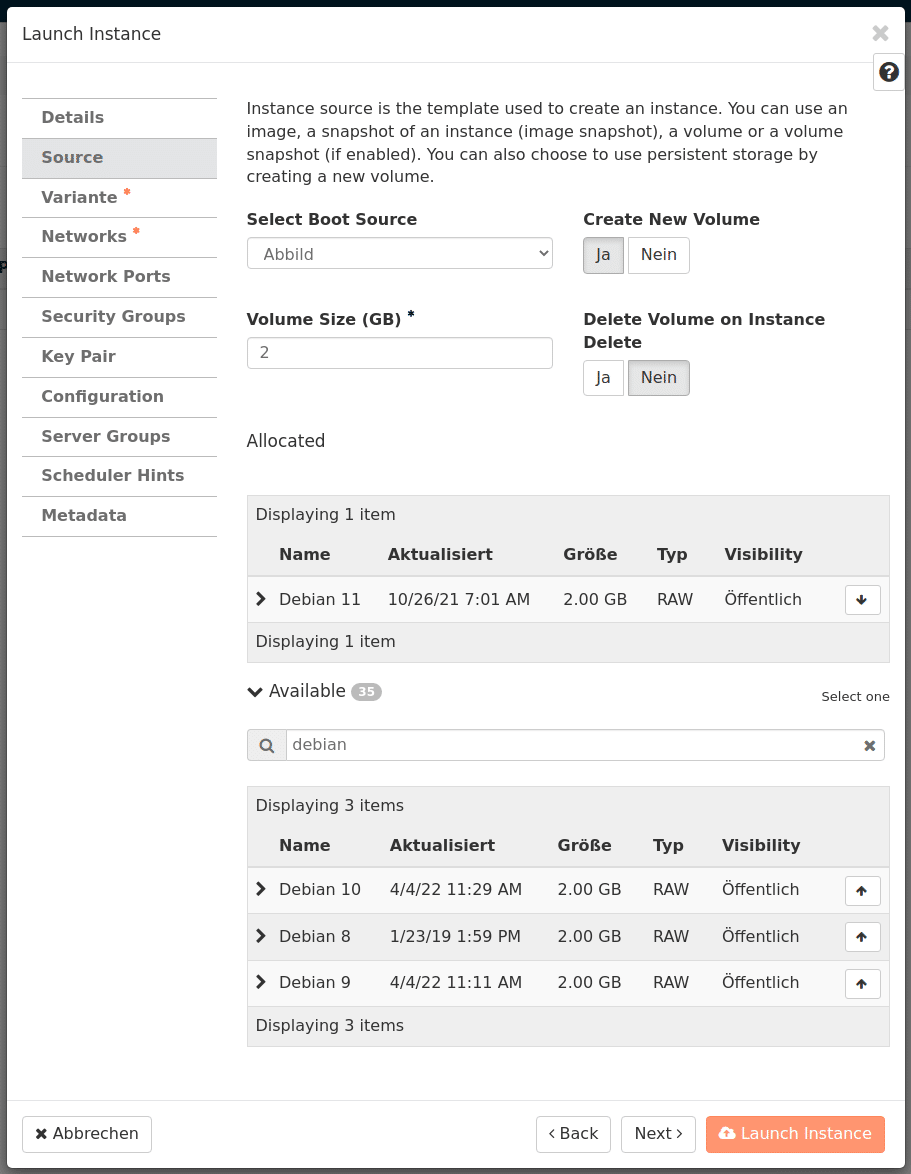
Here we select “Image” as the boot source and choose the desired operating system from the list at the bottom (the arrow on the far right to select). The question “Create New Volume” needs to be answered.
If you click “Yes”, you will get an vm with Ceph network storage volume. It will be replicated threefold at two locations. If the hypervisor dies where the vm is running on, we will start it on another host.
“No” will lead to creation of this vm on an ssd on the hypervisor. It will be faster, but will also have the disadvantage that its data lies on just one physical host (RAID 1). Assumed a hypervisor is broken theses vms will be not recoverable until it is fixed.
Windows server enthusiasts please choose “No” for performance reasons.
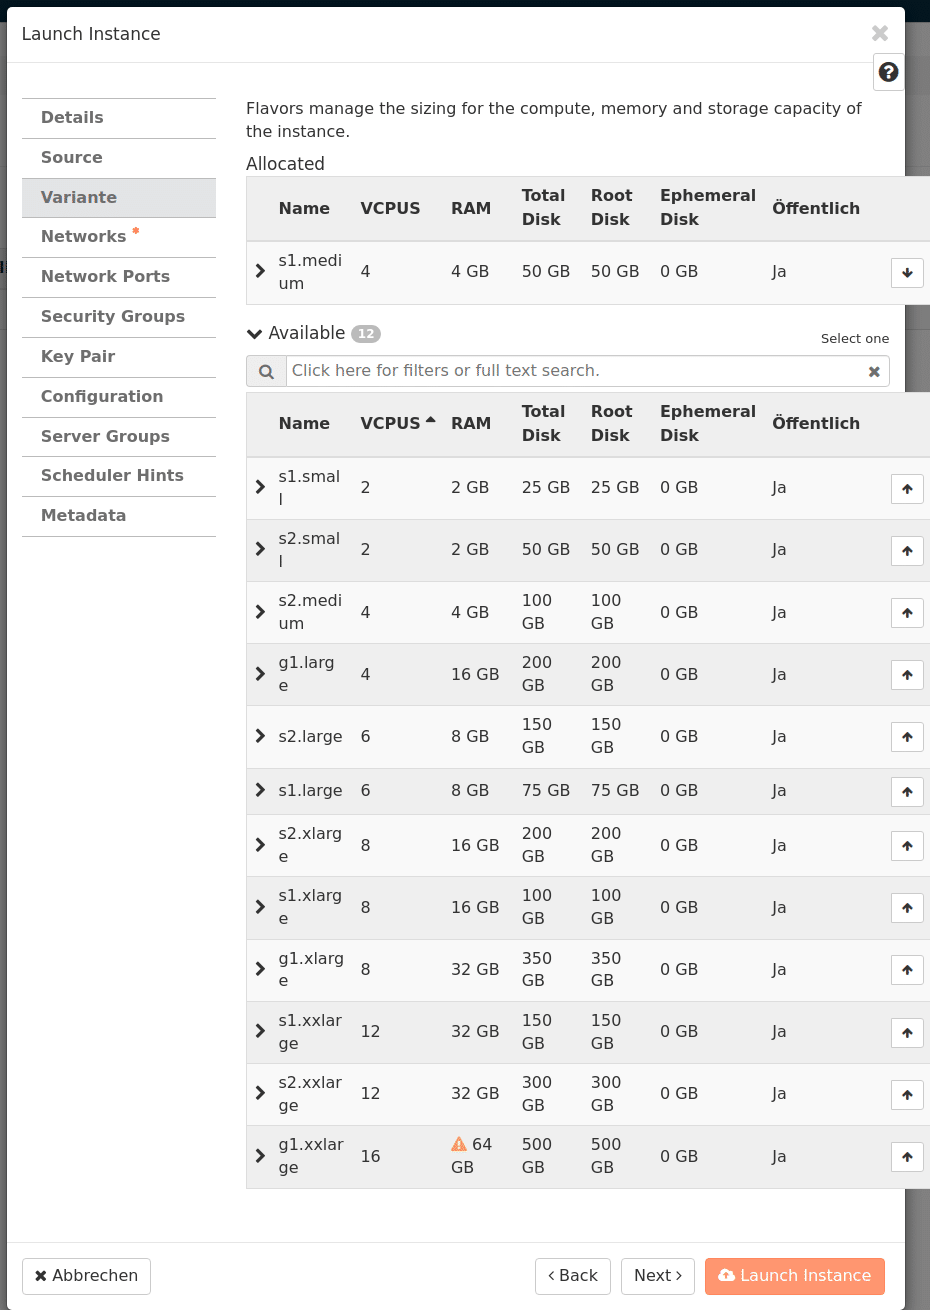
The menu item Flavour offers various presets for the desired sizes of the machines. Here you select what you need. Is a desired flavour missing? Just send us a short email and we will take care of it!
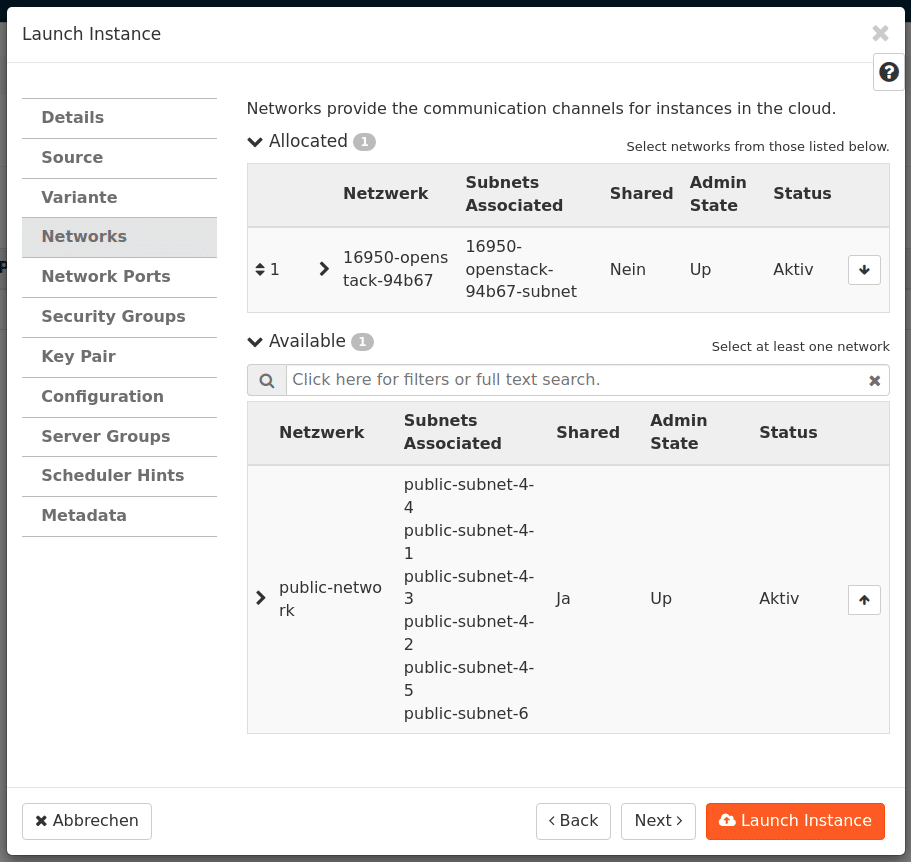
The next tab is all about networking, where our OpenStack network is selected, which is the same as our OpenStack project.
For the moment, we will ignore a few tabs and turn our attention to the Key-Pair tab.
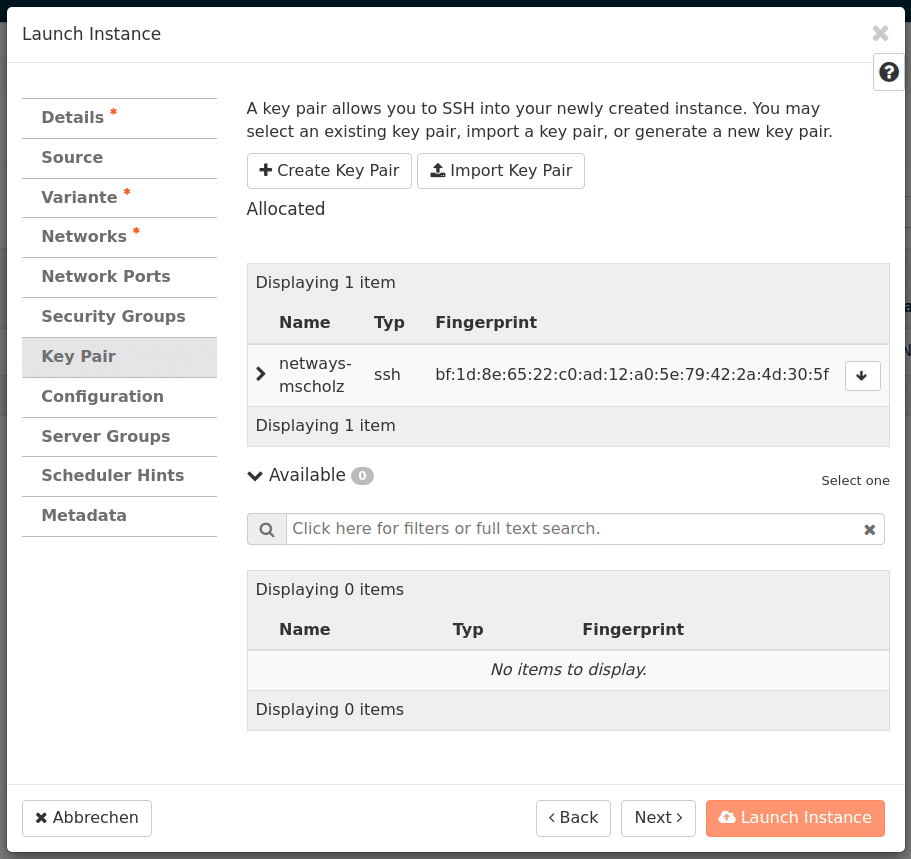
Using the button “Import Key Pair”, we import our SSH pubkey in its original form and give it a name of our choice. This is also clicked “up” again.
Finally, the instance can be started – only a few seconds later it is ready.
However, two things still need to be done before it can be used for the first time.
Assign a floating IP
To do this, we click on the small arrow pointing downwards on “Associate Floating IP” in the machine overview on the right of the desired machine, obtain a new IP from the pool using “+” and assign it to the machine.
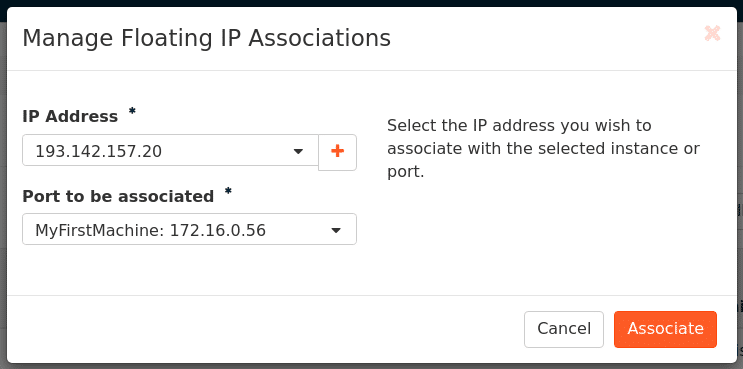
Now we see that the machine has an IP in the internal network, as well as the currently assigned floating IP – we need this later to connect to the machine.

Edit security groups
Our OpenStack already comes with a firewall. Therefore, access via SSH or RDP does not work yet. However, this is also done with a few clicks.
In the main navigation of OpenStack we go to Network->Security Groups. Here we “Manage” the “Rules” of our default security group via “Manage Rules” and add a new rule for SSH via “Add Rule” and release all networks for access for the time being.
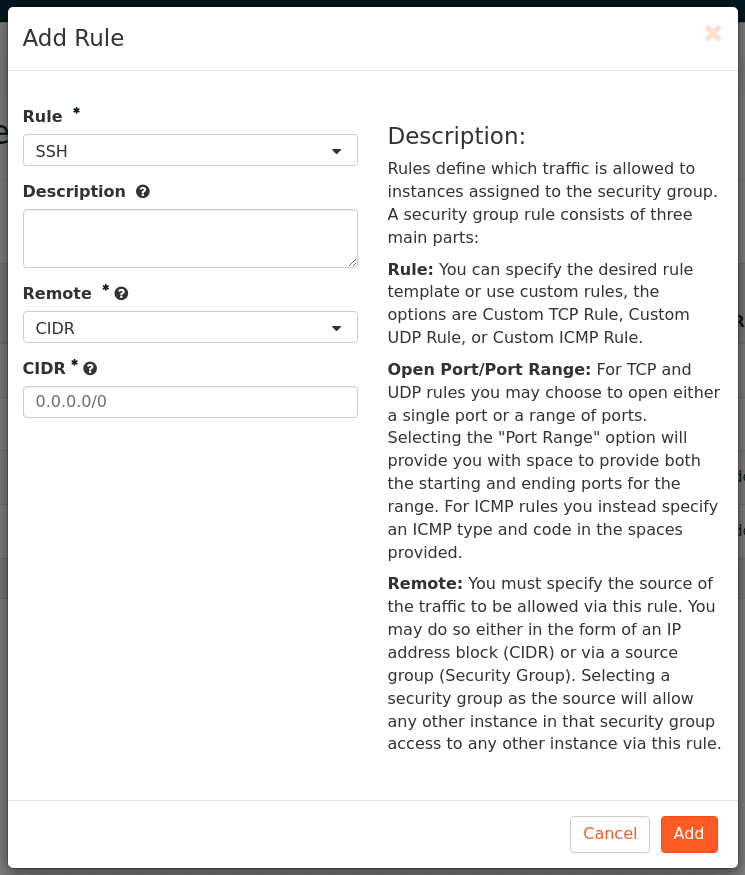
Since all created machines already contain the “default” rule, access to the machine via SSH works from now on. In later articles we will go into more detail about handling security groups and assigning them to machines, but that would go beyond the scope of this article.
In this article we go into more detail about the security groups.
Connect with machines
If all steps have been carried out as described, you can now connect to the machine via SSH using the floating IP. For Ubuntu systems, connect as user ubuntu, for Debian as debian, and so on. For Windows machines, you can enter the password when you start the machine for the first time; to do this, you have to click through the details in the instance overview of the machine.
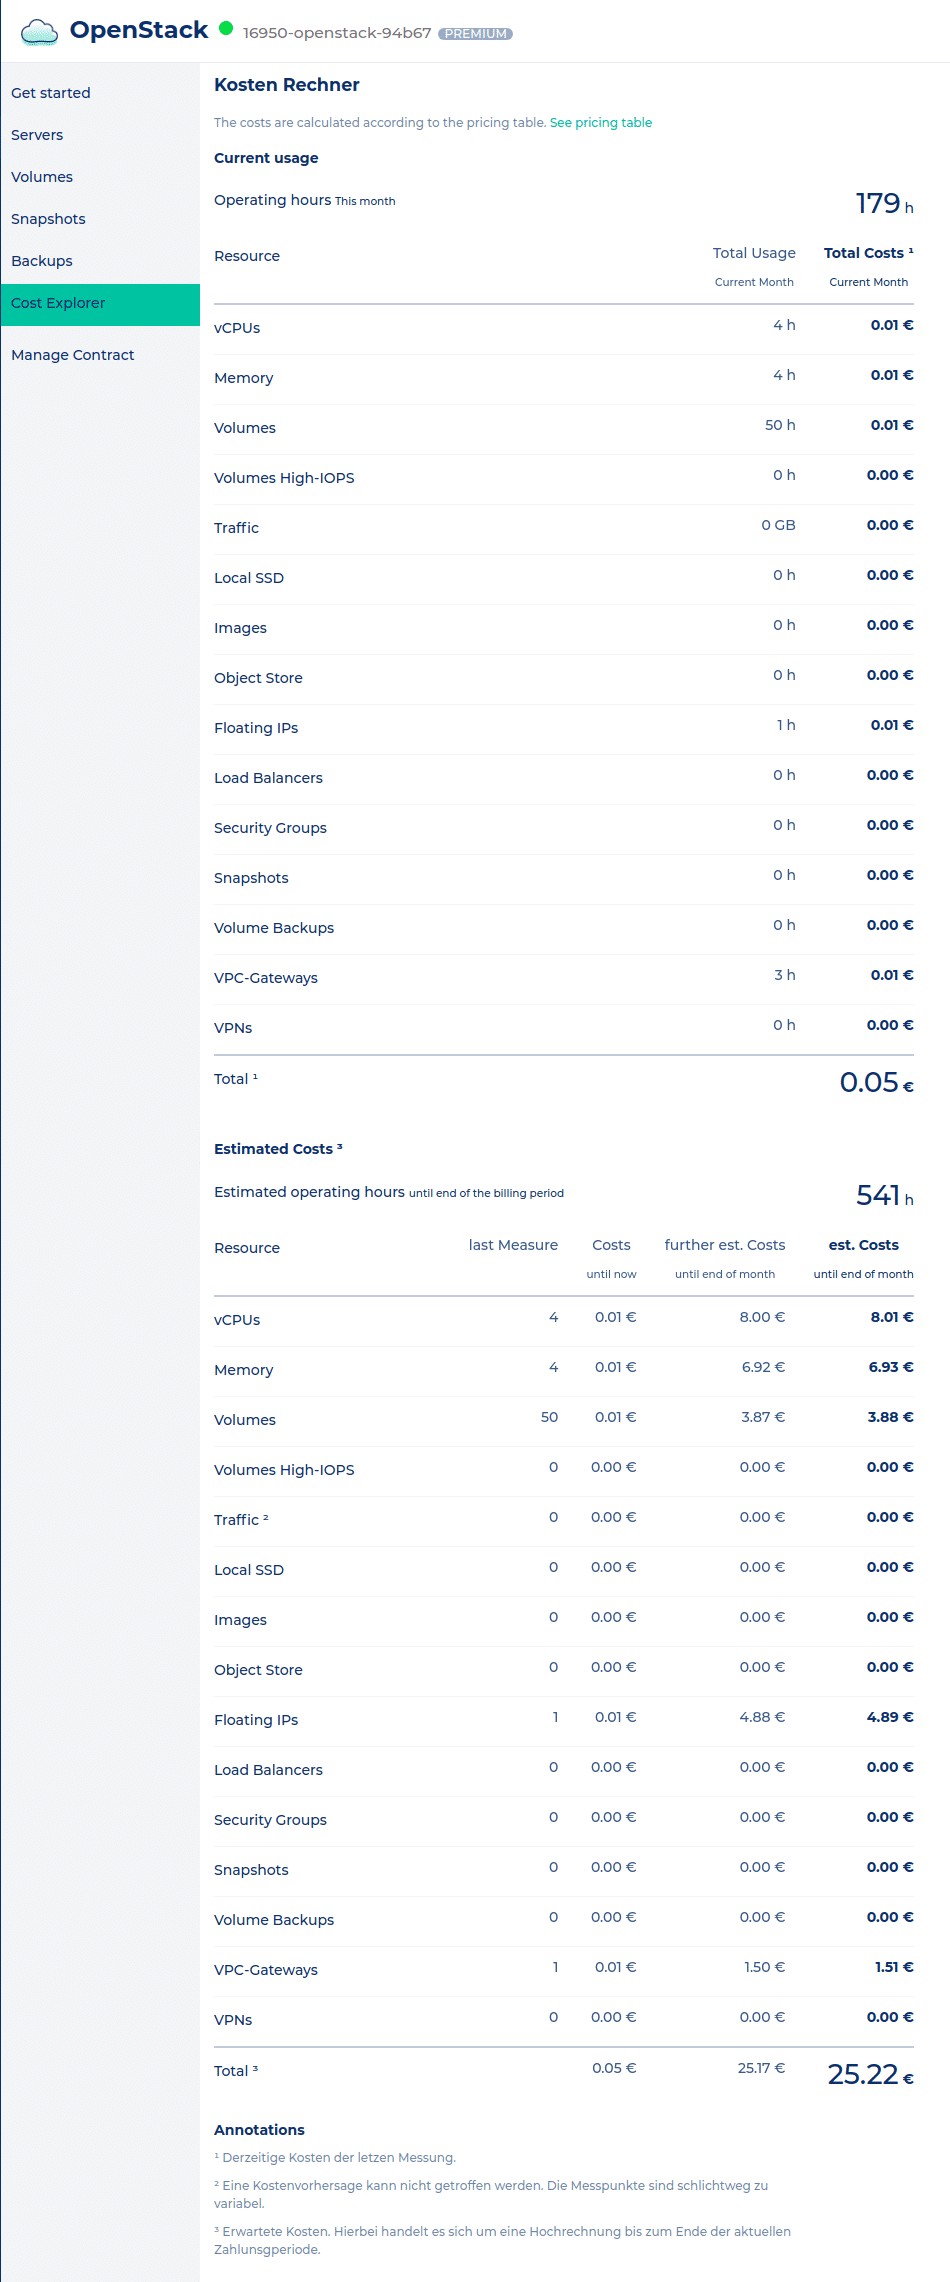
Cost
Time is money – for us too! That’s why all machines and individually used resources are billed by the hour (prices here) at fair and transparent prices. Therefore you can keep an eye on everything, we have recorded the current costs and the forecast for the current month (assuming constant use) in our cost calculator.
Need more?
No problem. With a little patience, more and more articles will come here. If you can’t wait or don’t want to bother, you can book a remote training with us, watch our webinar or book our competent MyEngineers.

Recent Comments