Many of you may already be familiar using Terraform with Azure or AWS. Although these may be the most used platforms, there is still a need for variety of other options due to local regulations (GDPR). As our systems are geared towards Open-Source, we will be looking at using Terraform with OpenStack. We try and integrate all of our services with OpenStack and make tutorials along the way to help the community too. Combining the power of Terraform with OpenStack you can get started right away with deploying servers at will. This tutorial will guide you through the first steps of using Terraform with an OpenStack project, let’s get going!
Understanding Terraform and OpenStack
Terraform is a fantastic infrastructure provisioning tool and in the right hands, it can change the way you deploy your resources. Terraform is relatively easy to get started with and within a few minutes we will be deploying servers in our OpenStack project. Terraform is declarative, what means that you define the end result and let Terraform figure out the rest for you. OpenStack is a great Open-Source cloud provider with lots of features that are widely accessible to a lot of applications.
Both of these tools are free and don’t require a purchase. You will only have to pay for the servers costs, which are by the way a lot cheaper at NETWAYS Web Services compared to other providers.
Installing Terraform
We are going to assume that you already have an OpenStack project and will focus more on the setup of of Terraform rather than OpenStack. For those of you that are also haven’t installed Terraform yet here is a quick guide to getting it installed on your computer.
If you are on macOS you are in luck, you will just need the following two commands to get started:
brew tap hashicorp/tap
brew install hashicorp/tap/terraform
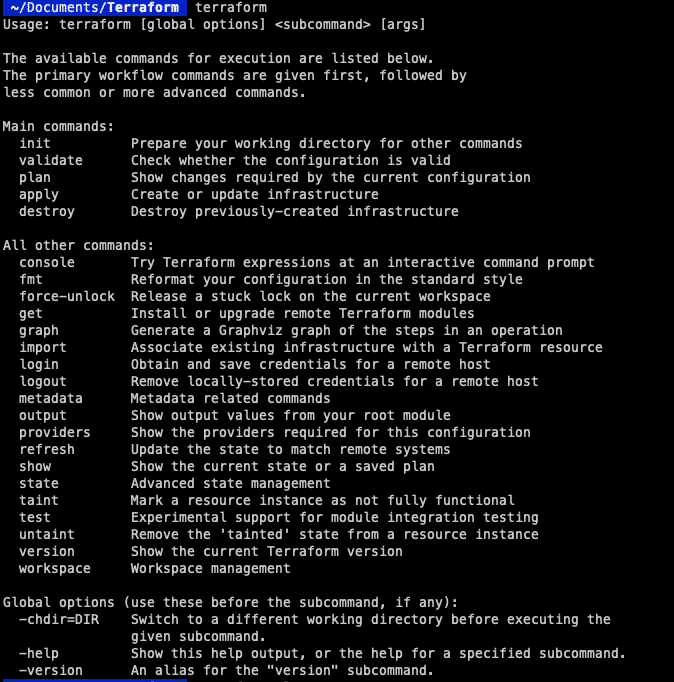
This will install the repository and everything you need to get started. To make sure everything works you can enter “terraform” into the console to see if you get a response.
If you are on Linux however you will need a few more commands to get up and running. We will start by adding the GPG Key to the system:
wget -O- https://apt.releases.hashicorp.com/gpg | gpg --dearmor | sudo tee /usr/share/keyrings/hashicorp-archive-keyring.gpg
Now we can add the HashiCorp official repository.
echo "deb [signed-by=/usr/share/keyrings/hashicorp-archive-keyring.gpg] https://apt.releases.hashicorp.com $(lsb_release -cs) main" | sudo tee /etc/apt/sources.list.d/hashicorp.list
Now we are ready to update the server and install Terraform.
sudo apt update
sudo apt install terraform
Here we can also check with the “terraform” command like before to see if everything is installed correctly. Terraform is installed and we are ready to start with the next step, authentication to allow us to communicate with OpenStack.
Configuring Terraform
With all Terraform environments we will need a file called “main.tf”. This will configure the cloud provider we want to use, including the servers we want to spin up and the modules we want to include (more on this in following tutorials). First of all you might want to create your own directory for Terraform but that is up to you.
mkdir terraform
cd terraform
vim main.tf
Here is my “main.tf” file and this is what the configuration part looks like
terraform {
   required_version = ">= 0.14.0"
   required_providers {
      openstack = {
         source = "terraform-provider-openstack/openstack"
         version = "~> 1.48.0"
      }
   }
}
provider "openstack" {
   auth_url = "https://cloud.netways.de:5000/v3/"
   user_name = "1234-openstack-56789"
   password = "supersecretpassword"
   region = "HetznerNBG4"
   user_domain_name = "Default"
   tenant_name = "1234-openstack-56789"
}
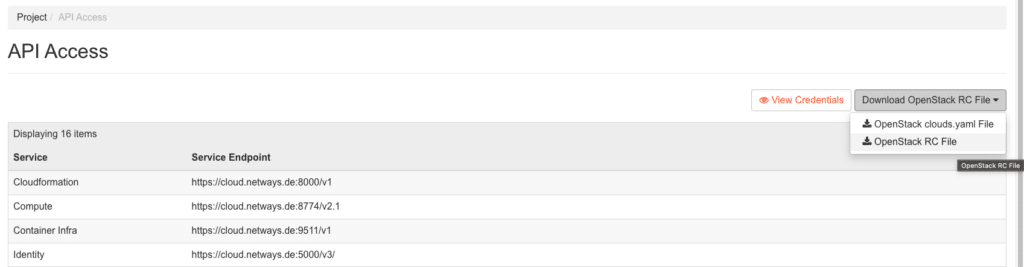
This is the basic setup that you will need in order to “talk” to your Openstack provider. At the top we will define the versions we want to use for Terraform and OpenStack. The “provider” section will be the authentication you will need to communicate with OpenStack. A lot of this information can be found in your project under API Access and clouds.yaml. This will include some of the following:
user_name – The user of your project password – Password for this project region – This is where your provider is located also in your clouds.yaml file user_domain_name – This is usually “Default” tenant_name – This is not in the clouds.yaml file but for me this was the same as my project name.
Alternative Configuration
As it is not possible to connect your My-NWS to terraform with Keycloak, we will have to use a different method. This is a little different and here we will need to download our OpenStack RC and create an application credential.
Here you can download your RC config and then use it to control your project.
source your-RCfile
Enter your credentials here and then insert the following command to create a resource. You can name this whatever you want but to make things easier we will just call it “terraform”. This secret is only shown once. So if you have a habit of misplacing things, it might be a good idea to make a copy of it.
openstack application credential create terraform
+--------------+----------------------------------------------------------------------------------------+
| Field        | Value                                                                                  |
+--------------+----------------------------------------------------------------------------------------+
| description  | None                                                                                   |
| expires_at   | None                                                                                   |
| id           | d02db6c5f165f44fe558g854gee1df6b                                                       |
| name         | terraform                                                                              |
| project_id   | 7f156c15865vv1b2165b516b7f52bc67                                                       |
| roles        | _member_                                                                               |
| secret       | supersecretpassword                                                                    |
| system       | None                                                                                   |
| unrestricted | False                                                                                  |
| user_id      | 5bee123b379c101f1c9fb37af5wf4f85g41rgg515584384459e59b707088e77e                       |
+———————+-----------------------------------------------------------------------------------------------+
Now we have permission to access our Openstack without having our password being visible. We can add this to our “main.tf” file and it should look something like this:
provider "openstack" {
  auth_url     = "https://cloud.netways.de:5000/v3/"
  region       = "HetznerNBG4"
  user_domain_name  = "Default"
  tenant_name  = "1234-openstack-12345"
  application_credential_id     = “your-id-goes-here“
  application_credential_secret = “your-secret-goes-here“
}
Now that the authentication side of things is sorted we can run the next command to initialise everything. In the directory “terraform” we can run this command:
terraform init
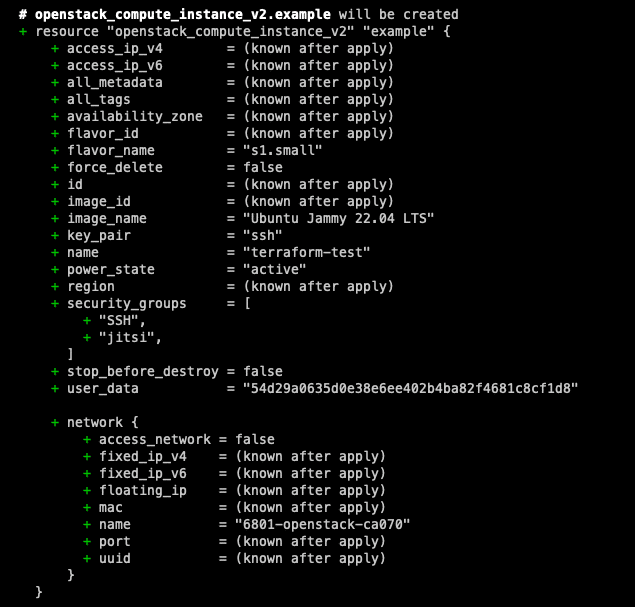
This is required as although we have installed Terraform, it doesn’t collect code for all providers and that is what we will do now, to get all we need for OpenStack. Now we are able to talk to our project, we can start building some infrastructure and get our resources running! For this example we will just be starting a server with a default flavour and SSH key. Here is my configuration for both resources:
resource "openstack_compute_instance_v2" “example-server" {
   name = "terraform-test"
   flavor_name = "s1.small"
   image_name = "Ubuntu Jammy 22.04 LTS"
   security_groups = [
      "HTTP",
      "SSH"
   ]

   network {
      name = "6801-openstack-ca070"
   }

   key_pair = "ssh"
}
Now this is a very simple setup to get us started and we will go through the necessary parts.
Other Necessities
The first part is the resource or server that we want to create. Make sure to align the values you are putting in with the values in your project, otherwise it will fail to create the instance correctly. The security groups I used were already in my project as I had configured those for a previous project. Underneath is my SSH key so that I am also able to connect to the server afterwards as this needs to be done when creating the server.
Here is my complete configuration for setting up the cloud provider and server I want to deploy:
terraform {
   required_version = ">= 0.14.0"
   required_providers {
      openstack = {
         source = "terraform-provider-openstack/openstack"
         version = "~> 1.48.0"
      }
   }
}

provider "openstack" {
   auth_url = "https://cloud.netways.de:5000/v3/"
   user_name = "1234-openstack-56789"
   password = "supersecretpassword"
   region = "HetznerNBG4"
   user_domain_name = "Default"
   tenant_name = "1234-openstack-56789"
}

resource "openstack_compute_instance_v2" “example-server" {
   name = "terraform-test"
   flavor_name = "s1.small"
   image_name = "Ubuntu Jammy 22.04 LTS"
   security_groups = [
      "jitsi",
      "SSH"
   ]

   network {
      name = "6801-openstack-ca070"
   }

   key_pair = "ssh"
}
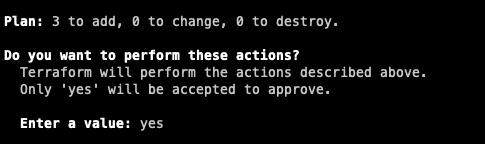
Now we have our configuration setup we can do a dry run to see what changes will be made. Although you will be asked before you actually apply the changes, it is always good practise to try the configuration first. This will allow you to check your code before it is deployed. The graph that comes with the command is very similar to git, it shows you ‘+’ and ‘-‘ for what will be changed. This way you get a clearer view of what will change before you do it for real.
terraform plan
Once you are happy with the changes and there aren’t any errors you can go ahead and run the next command to actually apply the changes. You will see that you will also get a similar screen like the “plan” command , but with the option of either confirming the changes or cancelling.
terraform apply
Once you are finished with the setup and you no longer need it, you can clear your resources afterwards with the following command. Be careful, this will remove the configuration and if there are more people working on the machine, they suddenly won’t be able to!
terraform destroy
Summary
And there you have it! Your first steps into the world of provisioning with OpenStack are complete. Although what we have achieved here is rather small, see it as a window of opportunity for the possibilities that are to come with your future projects as well. With Terraform’s declarative approach and OpenStack’s flexibility, provisioning and managing infrastructure resources becomes efficient and accessible. But it doesn’t stop there, stay tuned for more updates with Terraform as we dive into some more detailed configurations to use with OpenStack.
Get started with your own project by using our OpenStack cloud and if you ever find yourself in a pickle, one of our MyEngineers will always be there to help.