
by Martin Scholz | Dec 18, 2019 | Cloud, Tutorials
Depending on the type of production, it may be worthwhile for some server operators to automatically create virtual machines for a certain period of time and – after the work is done – to delete them again just as automatically; for example, if a computing job with their own hardware would take longer than is acceptable. Our cloud is happy to take care of this for you – even if it involves resources other than processors.
In this example, I will go over the first steps regarding this scenario, how to speak against the API of our OpenStack platform using Linux CLI.
To do this, you need an OpenStack client on the host running the scaling. On Ubuntu, for example, this would be the package python-openstackclient .
Next, the project-specific “OpenStack RC File v3” from the OpenStack WebUI is necessary. This file can be downloaded after logging into the project via the drop-down menu with one’s own project ID at the top right.
You source the file, therefore the client also knows which project to talk to against the API – requires password entry:
source XXXX-openstack-XXXXX-openrc.sh
In order to be able to set the options to be passed on for the start of a new instance, it is now possible to search for values (UUID; except for the key pair) for these, decide on the correct ones and note them:
- Source, the installation image to be used:
openstack image list
- Flavor, i.e. what dimensions the VM to be built should have:
openstack flavor list
- Networks, here I recommend the project’s own subnet, which is secured from the outside.:
openstack network list
- Security Groups, at least the default security group is recommended here, therefore all VMs can talk to each other fully, at least within the project.:
openstack security group list
- Key Pair, to connect via SSH:
openstack keypair list
Then the instance can already be started – if there is more than one value to be passed per option, list the option several times with one value each, the instance or server name last:
openstack server create --image $imID --flavor $flID --network $nID --security-group $sgID --key-name $Name $Servername
Ta-da, the VM is ready and willing to make its contribution to the day-to-day business.
If you would like to have more than one machine, z. B. three , additionally give these options in front of the server name:
--min 3 --max 3
To save your wallet, the servers can be deleted after the work is done:
openstack server list
openstack server delete $deID
This could also be done automatically, i.e. without looking for the ID of the instance:
deID=`openstack server list | grep Instanzname | cut -d ' ' -f 2` ; openstack server delete $deID
As I said, it is a good idea to include the Create, Compute and Delete commands in a script. If your own bash skills are not enough for you, you are welcome to contact our MyEngineers . The interposition of a load balancer is also not a problem here.

by Martin Scholz | Nov 20, 2019 | Cloud, Tutorials
Sooner or later, everyone who has a server running will reach the point where the VM (or parts of it) irreversibly ” breaks” – by whatever means.
Those who have dedicated themselves to backing up their data in advance are now clearly at an advantage and can expect significantly lower adrenaline levels – especially if the last backup was less than 24 hours ago. In our NWS backups and snapshots are easily configured for your vms to take nightly backups automatically.
In case of vms with SSD system volume there is just the menu feature backup.
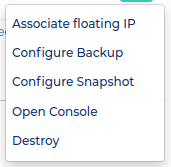
We set the retention period to a week for example and confirm:

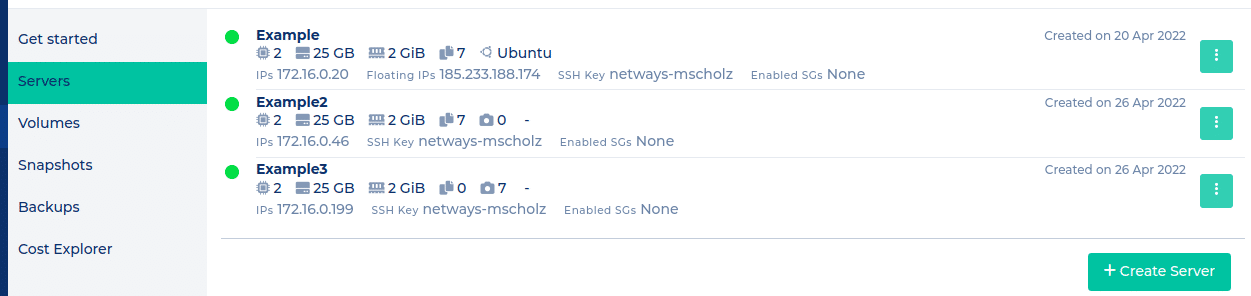
The NWS server list will offer an summary like this for these three cases:
Vm Example: SSD: backup
Vm Example2: Ceph volume: backup
Vm Example3: Ceph volume: snapshot
After their automatical production each night by us, they will become visible under their
particular menu item.
To be able to use a taken backup, we’ll have to switch to Horizon (OpenStack web UI) .
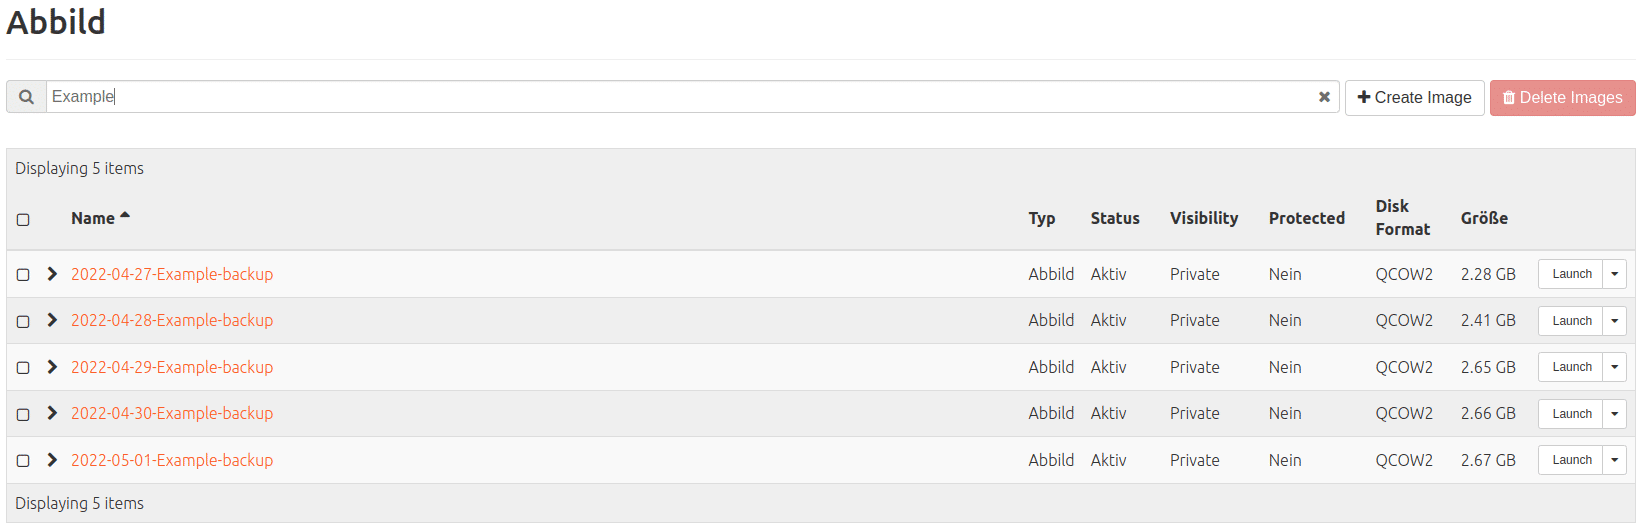
Five days after configuring the backups, you would find something like that for our three servers for example:
Backup (of SSD; findable under: Compute > Images
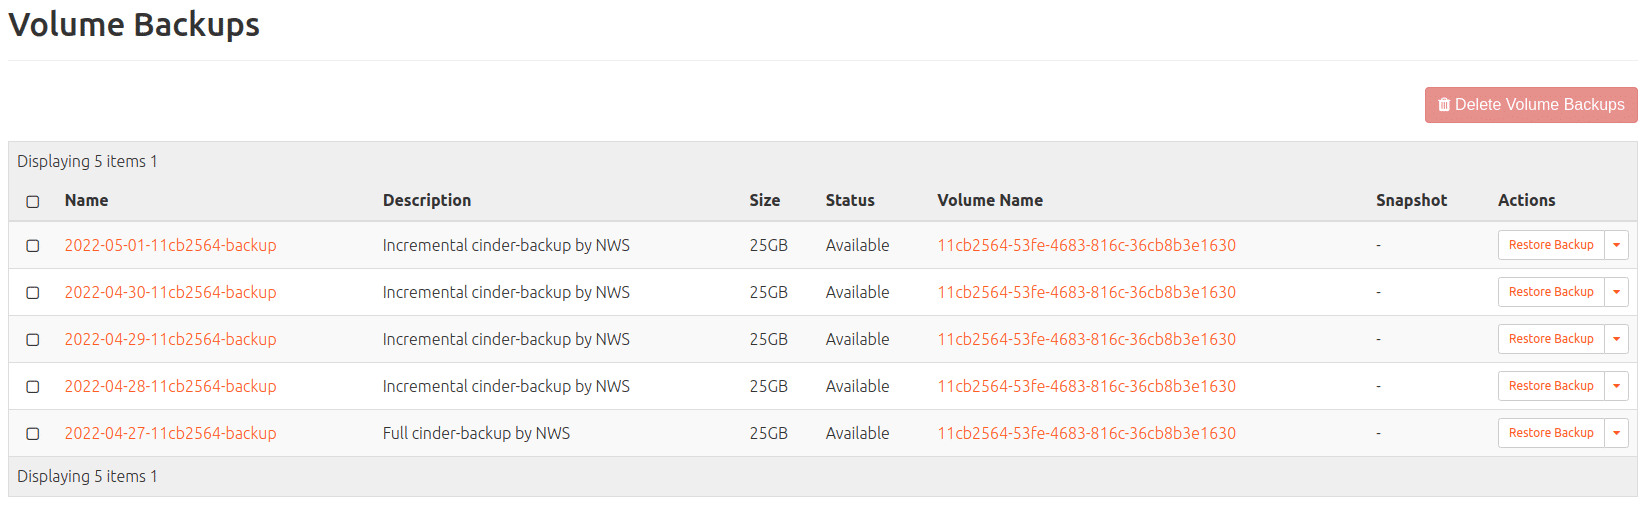
Volume Backup (of Ceph volume; findable under: Volumes > Backups)
Volume Snapshot (of Ceph volume; findable under: Volumes > Snapshots)
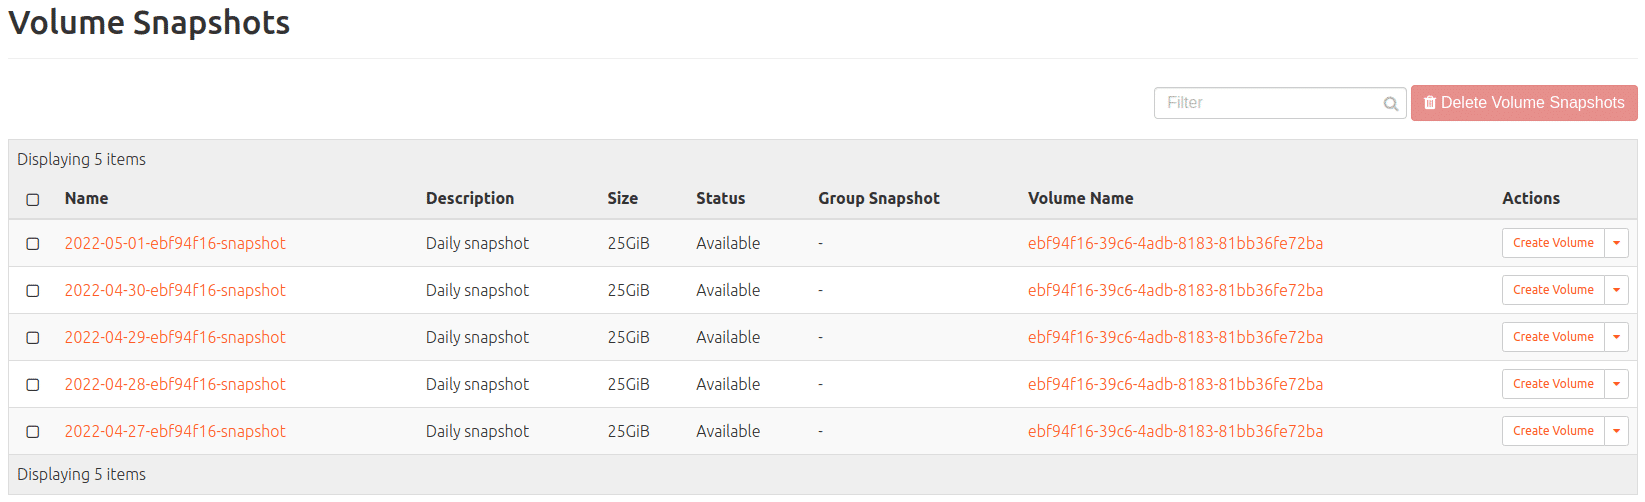
The last-mentioned Snapshots are increments of its underlying volume and are cheaper in comparison to backups; more shortly.
For those who wish to enter these backup settings manually via metadata:
|
|
what to modify:
|
|
|
|
Vm on SSD
|
Backup
|
Vm
(Compute > Instances)
|
nws_backup=true
|
rotation=7
|
|
Vm with
Ceph volume
|
Backup
|
Volume
(Volume > Volumes)
|
cinder-backup=true
|
cinder-backup-rotation=7
|
|
Vm with
Ceph volume
|
Snapshot
|
Volume
(Volume > Volumes)
|
nws_snapshot=true
|
rotation=7
|
Those who want to make their backups/snapshots available again, can e. g.
- create a volume from them and attach it to an existing vm
- (delete the crashed vm and) launch an new vm from it (vms with Ceph volume) or
- rebuild the machine with a particular image/backup (vms on SSD)
Snapshot vs. Backup?
During the production of a volume snapshot it is created in the central OpenStack storage. It is quickly available if needed. This snapshot is replicated threefold at two locations. Due to this replication your data is secured against everyday incidents like hardware failure. Snapshots also save you from bigger desasters like fire or flood at one of the sites. Why is a backup reasonable anyway?
Protection against human error: Is a wrong volume deleted accidentially, all of its data and snapshots are being deleted accordingly. An available backup won’t be affected from that and the volume can be recovered.
Protection against bugs: Albeit current storage systems hold in high quality and run reliably for years due to experience, mistakes in software can lead to data loss. A second independent storage for your backup lessens this hazard considerably.
You got lost replicating/copying? In case of any questions we’d gladly like to help.

by Martin Scholz | Nov 6, 2019 | Cloud, Tutorials
After clicking on the first new instance in our OpenStack web interface and assigning an SSH public key with which to connect to this VM, the newly minted administrator is faced with the small problem that he/she cannot access the instance from the outside; we have the “default” security group to thank for this.
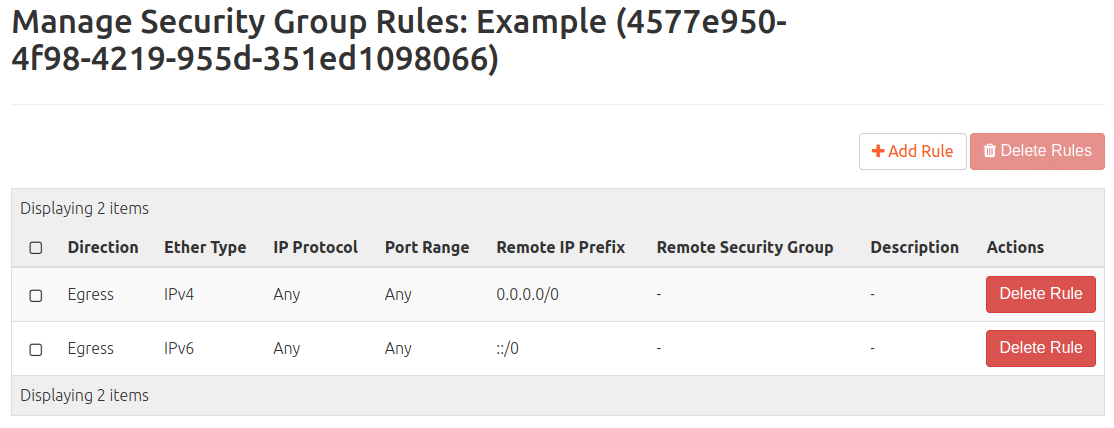
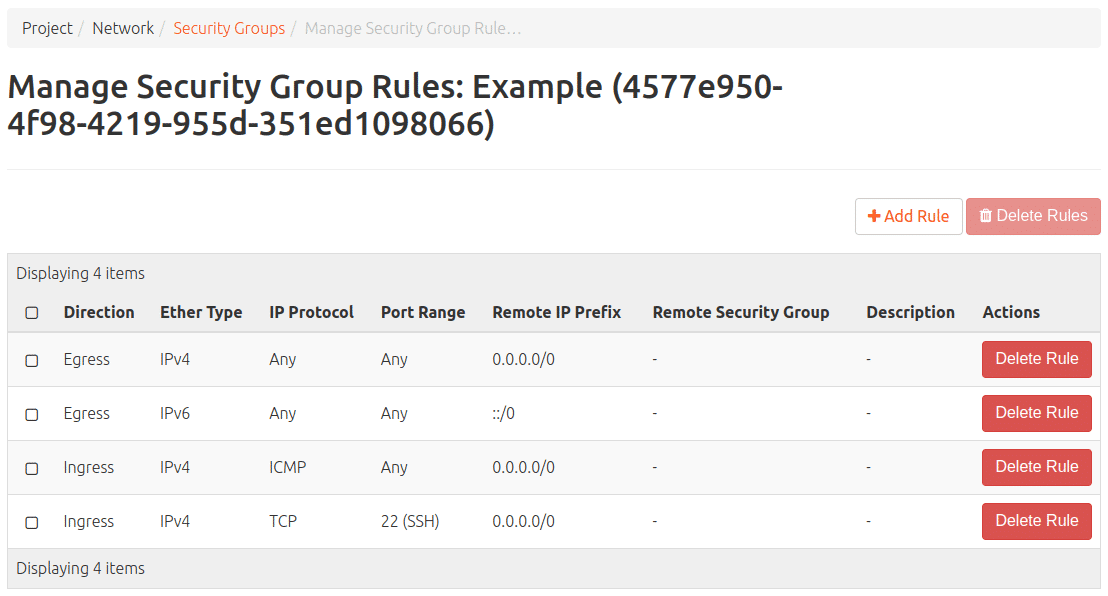
It contains these rules:
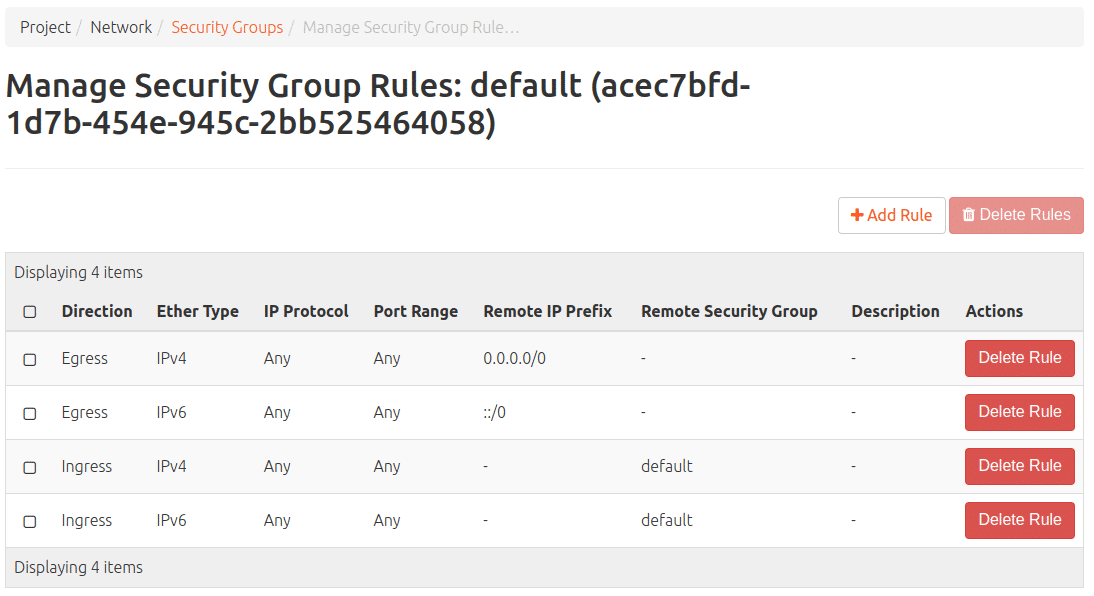
– Allow incoming connections with any protocol, on any port, but only from hosts on the internal network that also use the “default” security group (IPv4 and IPv6)
– Allow outgoing connections with any protocol, on any port and to anywhere (IPv4 and IPv6)
In this way, the protection of the new VM is ensured. Any connecting person from the outside can only really get through the access opening that has been provided and created for this purpose. There are two ways to create such an opening: A new security group can be created and provided with a rule, or a rule can be added to the default security group. The second has the disadvantage that the rule to be entered will be applied to all new instances with the default security group in the future, which will not always make sense on all VMs.
Create a new OpenStack security group
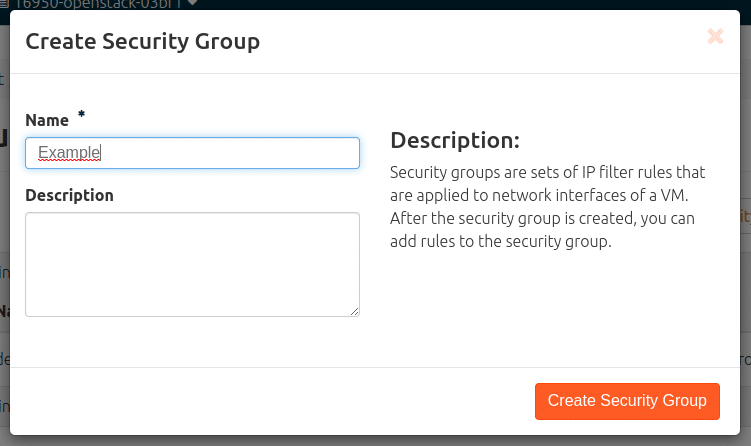
Click on: Network > Security groups > “+ create security group”.
A dialogue box appears in which, at will but obligatory, a name must be entered (and optionally a description can be entered). Here I call the new group “Example”, but any other name that follows its own grouping strategies, for example, will do. Then still Create Security Group.
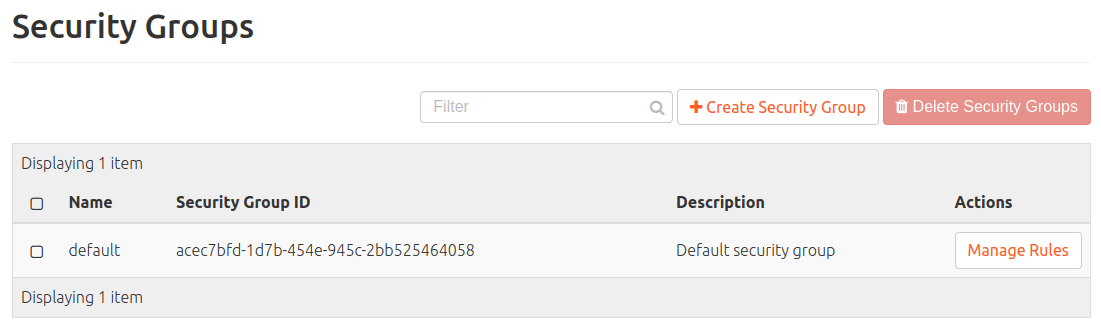
Then the following appears in the list:
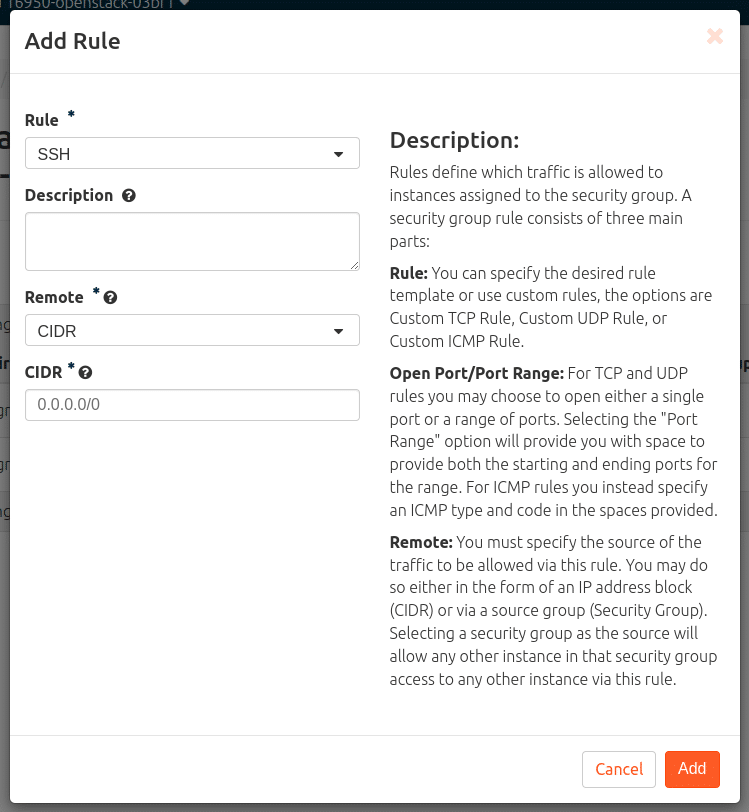
Add SSH reachability from external as a rule of a security group
Click on: Network > Security Groups > Manage Rules (on the security group that is to be edited).
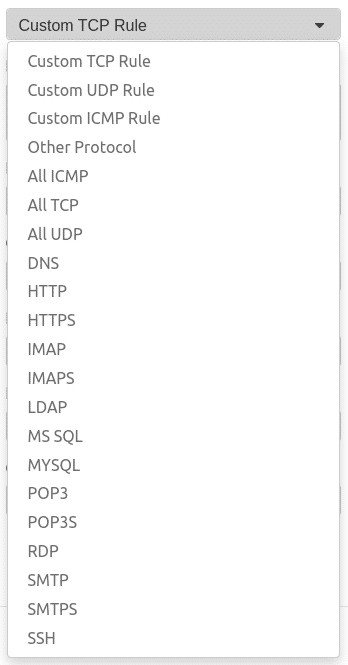
In a new, still unprocessed security group, you will only find one rule each for leaving (IPv4 and IPv6). Continue with: “+ Add rule”. In the drop-down menu Rule, select the sub-item SSH and “Add”.
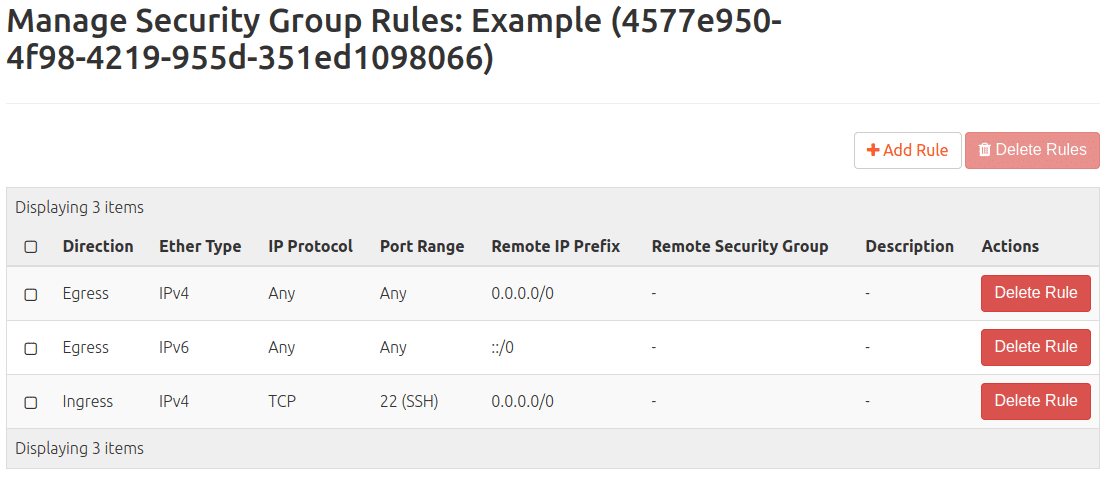
– If a security group (e.g. default) already assigned to the VM has been provided with this rule, the rule is applied immediately and the VM can be contacted via the CLI.
– If a rule has been created in a new security group that has not yet been assigned to the VM:
Assign a new security group to a VM
Navigate: Compute > Instances > Drop-down arrow (far right of the instance to be modified) > Edit security groups. Under “All security groups” you will find the new one, with the white-on-blue plus add the new security group to the “Instance security groups” and “Save”.

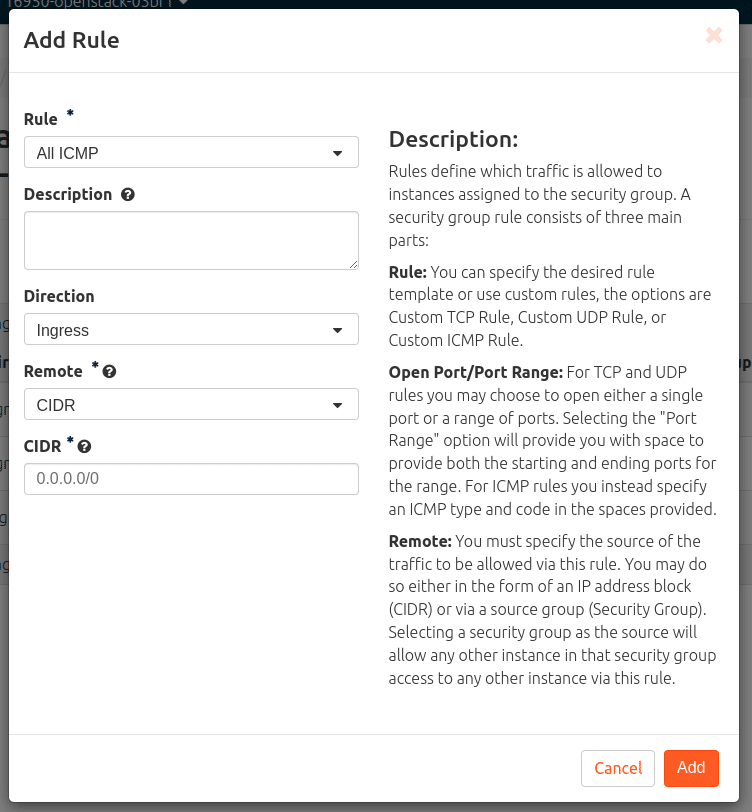
Create ICMP reachability from external as a rule
Network > Security Groups > Manage Rules (at the security group to be edited) > “+ Add Rule” > Rule = “All ICMP” > Add.
A rule for HTTP / HTTPS, for example, or the following also works in the same way
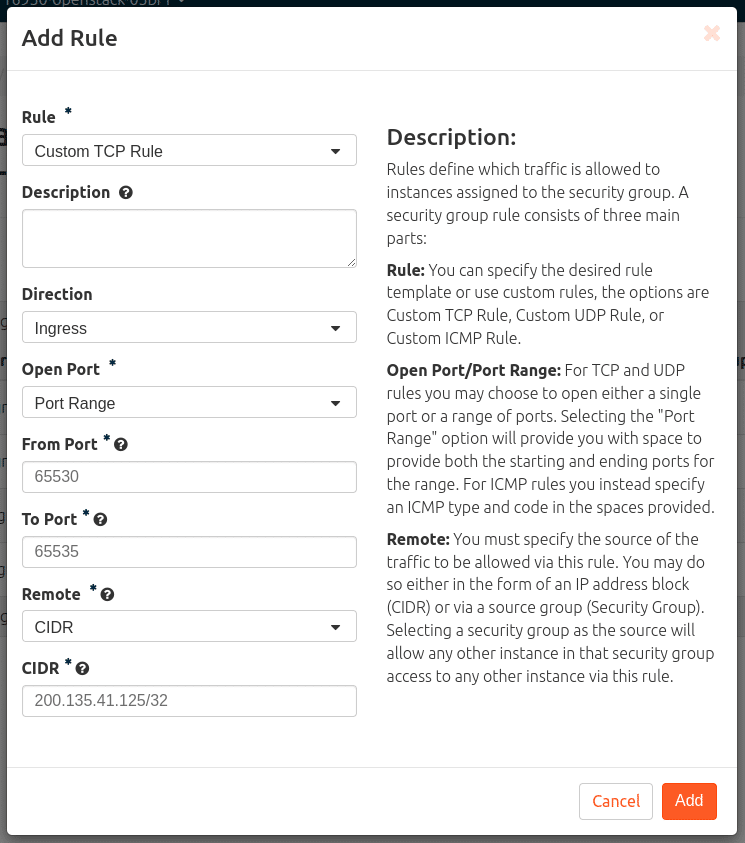
Rule example with more chicanery
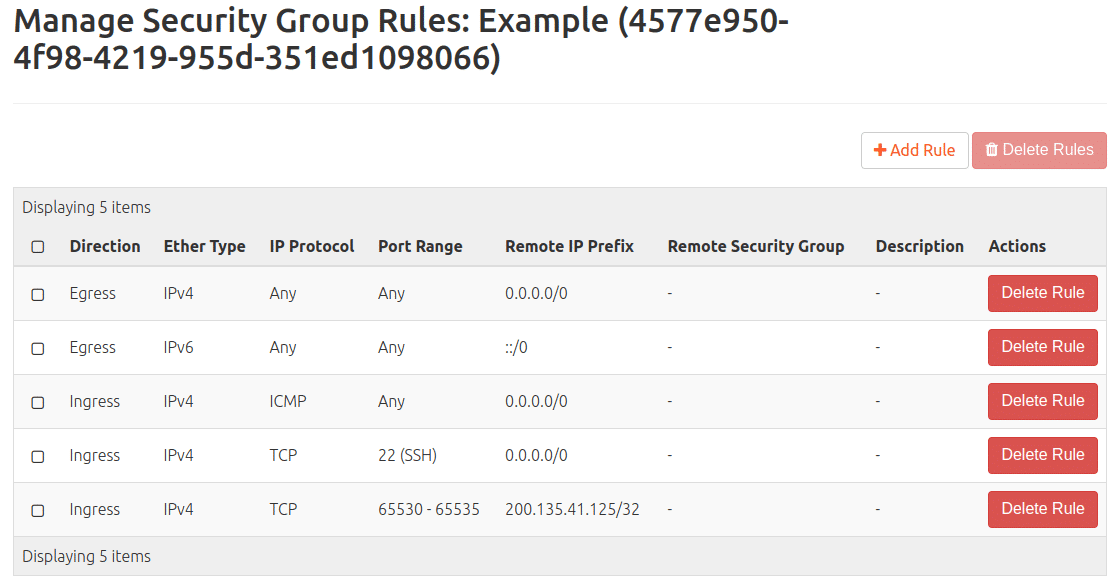
External accessibility with TCP in port range 65530-65535 only from IP 200.135.41.125
Network > Security Groups > Manage Rules (at the security group to be edited) > “+ Add Rule” > Rule = “Custom TCP Rule > Open Port = Port Range >
“From-Port” = 65530 > “To-Port” = 65535 > CIDR = 200.135.41.125/32 > “Add”
For those who find setting up and configuring new VMs too extensive or difficult, MyEngineer will be happy to create any desired setup.
The first project can be started in our NWS Cloud.

Recent Comments