In this tutorial, we will have a look at migrating servers from VMware to OpenStack.
After VMware’s recent acquisition by Broadcom, many Cloud Service Providers (CSPs) face termination of their partnership programs with VMware. With no further information publicly available, customers are left in uncertainty for now. Some vendors even started looking into alternatives to VMware’s platform to support already.
One of those alternatives could be OpenStack, the most widely deployed Open Source Cloud Software in the world, which is also powering our VPC offering.
If you want to learn more about OpenStack by NWS and why it’s a great replacement for VMware’s proprietary offering in general, take a look at our info page! If you’re here for our tutorial, read on.
Prerequisites
We will need a few things for this tutorial, including a migration machine running Linux and some software. All prerequisites are freely available, open-source software, which we can install from the official repositories of most Linux distributions.
Migration Machine
The so-called migration machine will be primarily used to convert the vmdk images used by VMware’s virtualization products to RAW images preferred by OpenStack. Since we will upload the converted image from this machine to OpenStack, it makes sense to run the machine close to your OpenStack installation from a network perspective.
In terms of the operating system, you can go with your preferred solution – the needed tooling is available in the official repositories of all major distributions. For this tutorial, I chose Ubuntu 22.04.3 LTS (Jammy Jellyfish).
Helper Tools
On our migration machine, we will need to install the following tools:
- the
openstackCLI - the
qemu-imgCLI
On Ubuntu, those tools can be used after installing the following packages from the official repositories:
apt install qemu-utils python3-openstackclient
After the installation finished, we can check if the tools we need got installed:
openstack --version
  openstack 5.8.0

qemu-img --version
  qemu-img version 6.2.0 (Debian 1:6.2+dfsg-2ubuntu6.16)
  © (c) 2003-2021 Fabrice Bellard and the QEMU Project developers
Preparing the Image
Once our migration machine is all set up, we need to export our virtual machine tutorial-host running on VMware. For this, we need access to the vCenter which hosts the VM:
- Navigate to your Host in the vCenter UI
- Identify the backing datastore of the host’s disks
- Navigate to the identified datastore and open the Datastore Browser
- Locate the folder named after your host
- Within this folder, select the file ending in
.vmdkand click Download
This should start the download of two files, a small one called tutorial-host.vmdk and a large one called tutorial-host-flat.vmdk
Once we downloaded the needed files and moved them both to our migration machine, we can continue with the actual conversion: We’ve got our .vmdk images and want to convert them to a single raw image, which we can do with the following command:
qemu-img convert -p -f vmdk -O raw tutorial-host.vmdk tutorial-host.raw
This will start the conversion while keeping us updated with a progress percentage throughout the process. Once finished, we will have a new tutorial-host.raw file in our directory.
Preparing OpenStack
Before we can continue migrating our servers from VMware to OpenStack, we need to go through a few steps first. Some of them, like uploading the converted image, are mandatory, while others are optional, e.g. setting a specific IP or MAC address depending on your environment.
Let’s start with uploading the image.
Uploading the Image to OpenStack
As we are now communicating with OpenStack directly, we need to tell our CLI tool openstack how to authenticate and which project to use. This information can be downloaded from Horizon, OpenStack’s web interface – detailed instructions on how to do so can be found in the official documentation.
If you are following along on an OpenStack project hosted by NWS, you can download the information from your OpenStack overview page at my.nws.netways.de. This will allow you to authenticate using your NWS ID, as well!
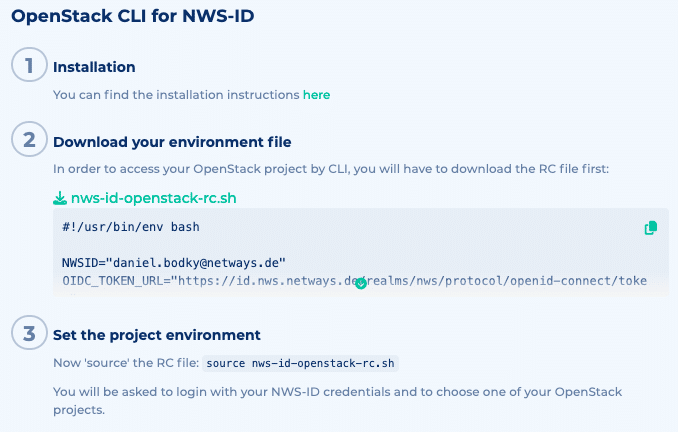
You can find instructions to configure the openstack CLI with your NWS ID on your OpenStack’s overview page.
After we got our OpenStackRC file, we can source it and upload the image to Glance, OpenStack’s image store:
source <OpenstackRC.sh>;
openstack image create --disk-format raw \
   --file tutorial-host.raw --progress tutorial-host-image
Once again, the CLI will display a progress bar for us to look at until the upload has succeeded. At this point, we could already start our virtual machine on OpenStack!
Specifying Network Settings for our Virtual Machine
Another optional prerequisite is a so-called port within OpenStack. With a port, we can bind a specific IP address and MAC address to our VM upon creation. This can be useful in scenarios where we not only need to migrate our machine’s state, but also its exact network configuration.
To configure our port, we need a few bits of information about OpenStack’s network(s):
- the network ID to create the port in, we can choose the right one from this list:
openstack network list - the subnet ID within the network, again, we can choose the right one from a list:
openstack subnet list - [optional] the security group ID(s) we want to attach to our port and thus to our VM:
openstack security group list
Once we’ve got the information we need, we can create our VM’s port – fill in the gathered IDs, IP address, and MAC address where indicated:
penstack port create --fixed-ip "subnet=<subnet-id>,ip-address=<ip-address>" \
    --security-group <securitygroup-id> \
    --network <network-id> \
    --mac-address <mac-address> \
    tutorial-host-port
If you want to attach more security groups, just repeat the --security-group parameter and pass additional IDs. If you don’t want to attach any security groups just now, omit the parameter altogether – you can still add them later.
When creating our virtual machine in the next steps, we can now reference the port by adding the following flag:
--port tutorial-host-port
Starting the Virtual Machine on OpenStack
We went through all mandatory and optional requirements and are ready to start our virtual machine on OpenStack at this point!
Still, there are different ways of migrating servers from VMware to OpenStack, depending on our requirements regarding fault tolerance, data persistency, etc.
Therefore, we will go through two possible ways of creating our VMs in the following section.
Starting the Virtual Machine from an Image
Choosing the simplest path, we can now go ahead and start our virtual machine straight from the uploaded image. Our VM is just one command away:
openstack server create --image tutorial-host-image --flavor s1.small \
    --wait tutorial-host
After some time, the CLI will print the machine’s attributes to the terminal, and our VM is up and running. We can double-check by having a look at the respective project in Horizon, OpenStack’s web UI:
Navigate to Compute > Instances and make sure you can see a new instance called tutorial-host in a Running power state.
This was easy! Simplicity comes with drawbacks, though: Because we are merely booting from an image, our VM’s data resides solely on its hypervisor.
This means, while data is persisted across reboots, we won’t be able to move the VM in case of a hypervisor failure, and the data will be gone upon deletion of the VM.
If your use case isn’t affected by these scenarios, that’s great! If you need some more robustness, read on to learn how to utilize persistent volumes with your virtual machines!
Starting the Virtual Machine from a Volume
Instead of running from an image and being completely reliant on the hypervisor our VM is running on, we can configure our VM to boot from a volume, which comes with a few advantages:
- on hypervisor failure, we can shift the VM to a different node and restart – the volume will still be available
- on VM deletion, we can retain the volume for later use
The command to spin up our VM in such a way that it uses a volume instead of an image looks like this:
openstack server create --image tutorial-host-image --flavor s1.small \
    --boot-from-volume 8 --wait tutorial-host
Note the extra parameter we’re passing. --boot-from-volume 8 tells OpenStack to create a new volume of 8 GB from the referenced image tutorial-host-image and use it as the root disk of our VM.
This way, we are booting the VM from a volume and can persist data properly.
If we want to make sure our VM is up and running, we can navigate to Compute > Instances in Horizon again and double-check – we should be good!
This is Just the Beginning
While we learned how to go about migrating servers from VMware to OpenStack, including network and storage configuration, there are more things to consider:
What about Windows VMs? More than one disk per VM? Additional configuration, like init scripts or secrets needed on the machines?
Those are topics for future tutorials, so stay tuned and subscribe to our newsletter to always be up-to-date! If you’ve got questions about OpenStack, our NWS offering, or the tutorial itself, feel free to send us a message.