

Accidentally terminated the SSH service, deleted the boot partition, or complications after updating the operating system? Most of us have stood in front of an inaccessible, misconfigured or otherwise broken server at some point and no longer had access.
Fortunately, in times of cloud servers, the underlying platforms usually offer a way to save your servers – and that’s exactly what this tutorial is about: VM rescue on OpenStack!
OpenStack Rescue Images
During a VM rescue on OpenStack, the affected server is restarted from a so-called rescue image – the root disk and the config volume of the faulty server are attached to the restarted VM so that any errors can be rectified. Technical details on this process can be found in the OpenStack documentation.
Due to limitations of OpenStack, this way of rescuing VMs using Rescue Images is only possible for Local Storage VMs.
Such a rescue operation can be carried out from the OpenStack Horizon web interface or via OpenStack CLI – in both cases a rescue image can be optionally specified – otherwise the server is booted from the same image that was originally configured for the server.
In the NETWAYS Cloud, we provide a dedicated rescue image based on Ubuntu 24.04 : the Netways Rescue Image. Equipped with this knowledge, we can take a look at how to rescue a VM on Openstack from Horizon or the terminal.
VM rescue on OpenStack in Horizon
If you navigate to Compute > Instances in Horizon’s web interface, you will see a list of all servers in the selected project. In the Actions menu of each listed server, the Rescue Instance option can be selected to initiate the rescue of a VM.

If you click on this option, a further menu opens in which the rescue image and a password for the rescue VM can be set. The Netways Rescue Image can now be selected here:
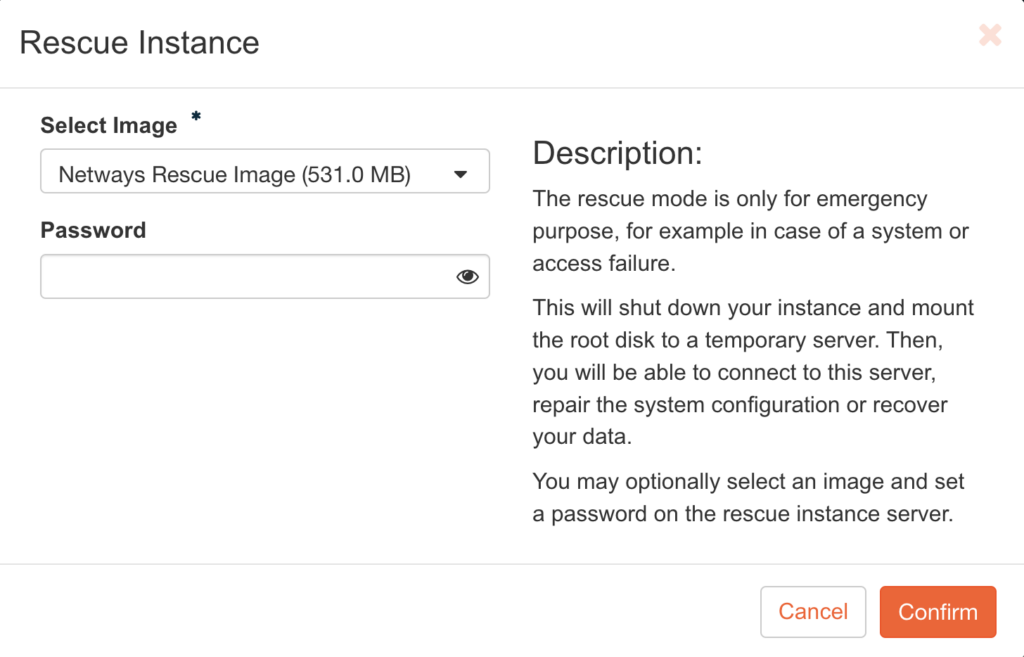
After confirming the dialog by clicking on Confirm, OpenStack starts the rescue session and attaches the root volume and the config volume. Please note that no new VM is created – IP, floating IP, server name etc. remain the same.
If you now switch to the detailed view by clicking on the server entry in the list and then to the Console tab, you will be greeted by the login console of the rescue image, including SSH keys and access data to log in and start the VM rescue on OpenStack!
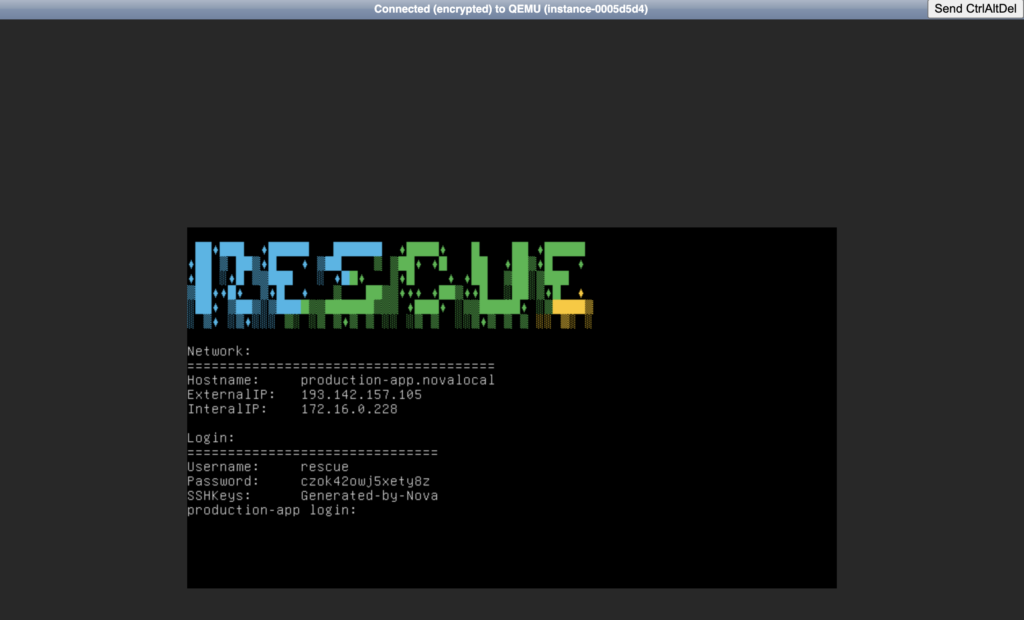
After logging in – either via SSH or directly via the web console – the original root volume of the faulty VM can be mounted. This is usually available as a device vdb and the root partition as vdb1.
Once the necessary changes have been made or undone, the server can be returned to normal operation via the Actions menu and the Unrescue option.
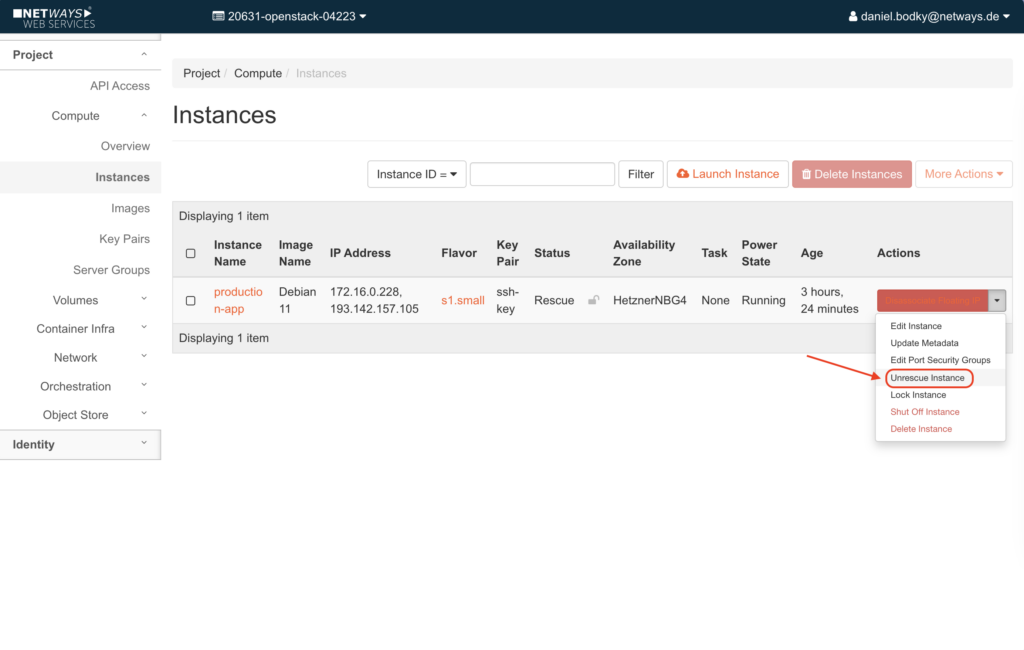
The VM is then rebooted from the originally configured image and (hopefully) works as desired again. VM rescue on OpenStack successful!
VM rescue on OpenStack with the OpenStack CLI
If you prefer to use the OpenStack CLI instead of Horizon, e.g. to automate necessary rescue operations, this is of course also possible! The prerequisite is of course a configured OpenStack client.
The first thing to do now is to find out the image ID of the desired rescue image and the server ID of the VM to be rescued:
$ openstack image list -c Name -c ID --name "Netways Rescue Image"
+--------------------------------------+----------------------+
| ID                                   | Name                 |
+--------------------------------------+----------------------+
| bec9c564-8ca0-47fe-8df1-1b7ec5ea7279 | Netways Rescue Image |
+--------------------------------------+----------------------+

$ openstack server list -c Name -c ID
+--------------------------------------+----------------+
| ID                                   | Name           |
+--------------------------------------+----------------+
| 245b5fa7-b1c1-4829-8328-ddcbd53492ca | production-app |
+--------------------------------------+----------------+Once you have gathered the required information, the server can be put into rescue mode with another command from the OpenStack CLI:
$ openstack server rescue --image bec9c564-8ca0-47fe-8df1-1b7ec5ea7279 \
245b5fa7-b1c1-4829-8328-ddcbd53492caIf the command is successful, there is no further output and we can get started with the VM rescue on OpenStack! After logging in – either via SSH or directly via the web console with the access data displayed there – the original root volume of the faulty VM can be mounted. This is usually available as a device vdb and the root partition as vdb1.
Once the rescue is complete, the VM can be returned to productive operation with the command openstack server unrescue. There is no further output with this command either:
$ openstack server unrescue 245b5fa7-b1c1-4829-8328-ddcbd53492caVM rescue on OpenStack successful!
Concluding words
Just because a VM no longer responds after an operating system update or you have “locked yourself out” is no reason to bury your head in the sand (or delete the VM)! There are ways and means of rescuing VMs on OpenStack.
Whether via the web interface or via OpenStack CLI, the NETWAYS Cloud makes it possible to restore faulty servers in the shortest possible time and ensure smooth operation.
For more information and tutorials about the NETWAYS Cloud, take a look at our other Cloud tutorials or browse through the NWS documentation.


0 Comments