

In this guide, we will show you how to implement your Nextcloud configuration with Kustomize on a Kubernetes cluster.
Prerequisites
- A Kubernetes cluster (e.g. Managed Kubernetes from NETWAYS)
- NGINX Ingress Controller (configure: allow-snippet-annotations: “true”)
- Cert Manager
- ClusterIssuer
kubectl(withkustomize)- Manifest files (available on GitHub)
- More tutorials
What is Kustomize?
Kustomize is an open source tool for managing Kubernetes configurations. It allows you to change objects such as Deployments, DaemonSets, Services and ConfigMaps for different environments without changing the original YAML files.
Unlike the traditional approach of creating separate YAML files for each environment, Kustomize avoids redundancy and simplifies management. It is directly integrated into kubectl, making it easier to manage and provision Kubernetes resources.
Kustomize was developed specifically for Kubernetes and is supported by its sig-cli community.
Key concepts in Kustomize
Kustomize is based on two main concepts:
- Base: Basic YAML files that are shared for all environments.
- Overlay: Environment-specific adjustments.
By applying the overlays of the YAML files, you create an individual configuration:
Base + Overlay = Customized Manifest
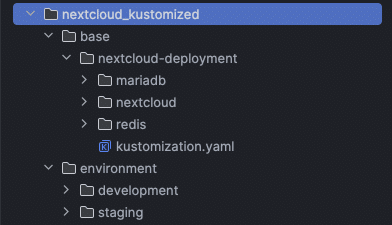
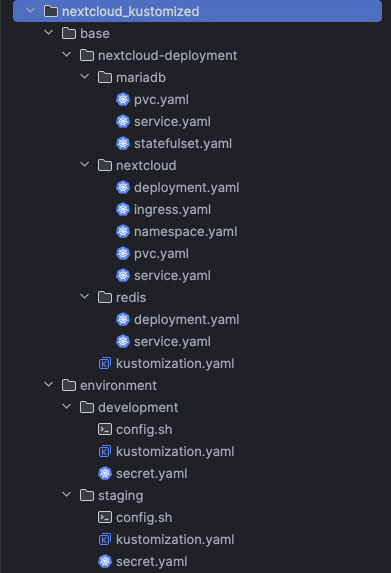
All files for the following configuration can be found in the GitHub repository. Open the folders to view the complete manifest that is customized with Kustomize. All changes are made in the file kustomization.yaml.
Get started with the Nextcloud configuration with Kustomize
There is already a file kustomization.yaml in the base directory that defines which resources are to be applied to the cluster:
resources:
  - './nextcloud/namespace.yaml'
  - './nextcloud/pvc.yaml'
  - './nextcloud/service.yaml'
  - './nextcloud/deployment.yaml'
  - './nextcloud/ingress.yaml'
  - './mariadb/pvc.yaml'
  - './mariadb/service.yaml'
  - './mariadb/statefulset.yaml'
  - './redis/deployment.yaml'
  - './redis/service.yaml'
base/nextcloud-deployment/kustomization.yamlTo change the manifest, we will later need an additional kustomization.yaml to create Secrets and ConfigMaps.
Definition of namespaces and resources
First, we specify the Namespace in which Nextcloud is to be deployed. As in the base, we reference the Nextcloud deployment and the file secret.yaml in the same directory:v
apiVersion: kustomize.config.k8s.io/v1beta1
kind: Kustomization
namespace: nextcloud-deployment
resources:
  - ../../base/nextcloud-deployment
  - secret.yaml
environment/development/kustomization.yamlCustomization of the Ingress
The manifest contains a Ingress, which currently uses a sample domain. To change the domain, we use patches.
Patch types in Kustomize
Kustomize supports two types of patches:
- Strategic Merge Patch:Adds or modifies fields in Kubernetes resources by merging the patch file with the existing configuration.
- JSON patch: Enables precise changes, such as adding, removing or replacing fields (based on the JSON patch specification RFC 6902).
In this example, we use a JSON patch to update the domain in Ingress:
patches:
  - patch: |-
      - op: replace
        path: /spec/rules/0/host
        value: my-nextcloud.works.com
      - op: replace
        path: /spec/tls/0/hosts/0
        value: my-nextcloud.works.com
        target:
        kind: Ingress
        name: nextcloud-ingress
environment/development/kustomization.yamlUsing the ConfigMapGenerator
The script config.sh should be mounted as ConfigMap in the Deployment. The ConfigMapGenerator from Kustomize can automatically convert the script into a ConfigMap:
configMapGenerator:
  - name: nextcloud-config-sh
    files:
    - config.sh
environment/development/kustomization.yamlThe same approach works for Secrets with the secretGenerator. If a secret already exists, specify the type (merge or replace).
Creating a ConfigMap without a file
You can also create ConfigMaps directly in the customization by entering specific values:
configMapGenerator:
  - name: nextcloud-configuration
    literals:
    - nextcloud_trusted_domains=my-nextcloud.works.com
    - cli_url=https://my-nextcloud.works.com
    - nextcloud_admin_user=admin
    - redis_host=redis
    - php_memory_limit=716M
    - php_upload_limit=10G
environment/development/kustomization.yamlRemoving the hash suffix
To remove the automatically generated hash suffix, add this option:
generatorOptions:
  disableNameSuffixHash: true
environment/development/kustomization.yamlIn the end, your customization should look like this. Pay attention to the indentation.
apiVersion: kustomize.config.k8s.io/v1beta1
kind: Kustomization
namespace: nextcloud-deployment
resources:
  - ../../base/nextcloud-deployment
  - secret.yaml

patches:
  - patch: |-
      - op: replace
        path: /spec/rules/0/host
        value: my-nextcloud.works.com
      - op: replace
        path: /spec/tls/0/hosts/0
        value: my-nextcloud.works.com
        target:
        kind: Ingress
        name: nextcloud-ingress

generatorOptions:
  disableNameSuffixHash: true

configMapGenerator:
  - name: nextcloud-config-sh
    files:
      - config.sh

  - name: nextcloud-configuration
    literals:
      - nextcloud_trusted_domains=my-nextcloud.works.com
      - cli_url=https://my-nextcloud.works.com
      - nextcloud_admin_user=admin
      - redis_host=redis
      - php_memory_limit=716M
      - php_upload_limit=2G

  - name: mariadb-configuration
    literals:
      - mariadb_db=nextcloud
      - mariadb_user=nextcloud
      - mariadb_host=mariadb-service
      - mariadb_init=--locale=C --encoding=UTF-8

environment/development/kustomization.yamlApplication and tests
To check the configuration, execute the following command in your environment directory:
$ kubectl kustomize .
nextcloud_kustomized/environment/developmentkubectl apply generates the final manifest and applies it to the cluster. If there are any problems, Kustomize will point them out.
$ kubectl apply -k .
nextcloud_kustomized/environment/developmentConclusion
Kustomize is a powerful tool for managing Kubernetes configurations, but it requires technical know-how. For many users, this might be too complex, which is why we offer a Managed Nextcloud App that includes regular updates and support.


0 Comments