

In one of the first tutorials on our site, we showed you how to install and set up Ingress-NGINX in your cluster. Today we’ll go one step further and look at how you can secure Ingress-NGINX and your services with the help of TLS certificates through Cert-Manager!
What is Cert-Manager?
Cert-Manager is a CNCF project for the automatic or programmatic provisioning of TLS certificates. The program continuously monitors annotated resources (e.g. Ingress objects) and a collection of CustomResourceDefinitions to request, create and renew certificates for your workloads. The list of supported Certificate Authorities includes ACME, GlobalSign, Hashicorp Vault, or Cloudflare Origin CA. Now that this initial question has been answered, let’s take a look at how to secure Ingress-NGINX with Cert-Manager!
Installation of Ingress-NGINX
In order to secure Ingress-NGINX, we need to install Ingress-NGINX – logical! We will use Helm, a kind of package manager for Kubernetes. Similar to the installation of software packages on an operating system, the installation of applications on Kubernetes using Helm also follows a certain pattern:
- Configuring the repository
- Query available packages and versions
- Installation of the desired package
With a helmet, this process looks like this:
helm repo add ingress-nginx https://kubernetes.github.io/ingress-nginx
helm repo update
helm install --namespace ingress-nginx --create-namespace ingress-nginx \
ingress-nginx/ingress-nginxThe third command may look a little strange – why do we have to enter
ingress-nginx four times? The first specification is for the name of the namespace in which we want to install our application. The second specification is for the release name that Helm uses to manage our installation(s), and the third/fourth specification references the repository or package used.
If all three commands terminate successfully, Ingress-NGINX has already been successfully installed and is ready to process requests to the services in our cluster. We can therefore continue with the installation of Cert-Manager.
Installation of Cert-Manager
Just as for the installation of Ingress-NGINX, we can also use Helm for Cert-Manager. We add the corresponding repository, sync the available packages and install Cert-Manager in our cluster. With the additional setting installCRDs, we ensure that the CustomResourceDefinitions used by Cert-Manager is also installed.
helm repo add jetstack https://charts.jetstack.io/
helm repo update
helm install --namespace cert-manager --create-namespace cert-manager \
jetstack/cert-manager --set installCRDs=trueCert-Manager is also successfully installed as soon as the Helm commands terminate successfully. All we need now is a so-called Issuer.
Creation of an issuer
As mentioned at the beginning, Cert-Manager supports many different certificate providers. To do this, it must of course know which authority is to be used to issue a certain certificate. Cert-Manager’s Issuer CRDs can be used for this purpose. In this tutorial, we will use the ACME Issuer, which allows us to create Let’s Encrypt certificates for our services:
---
apiVersion: cert-manager.io/v1
kind: ClusterIssuer
metadata:
  name: letsencrypt-staging
  namespace: cert-manager
spec:
  acme:
    # You must replace this email address with your own.
    # Let's Encrypt will use this to contact you about expiring
    # certificates, and issues related to your account.
    email: daniel@example.com
    # we will only use the staging API for this tutorial
    server: https://acme-staging-v02.api.letsencrypt.org/directory
    privateKeySecretRef:
      # Secret resource that will be used to store the account's private key.
      name: acme-staging-key
    # Add a single challenge solver, HTTP01 using nginx
    solvers:
      - http01:
          ingress:
ingressClassName: nginxThis Issuer uses the Let’s Encrypt staging API to create valid (but untrusted) certificates for our services. To verify the authenticity of our services, HTTP01 challenges are used (see Let’s Encrypt Challenge Types). If we look closely, we can see that instead of a Issuer, we use a ClusterIssuer that can be referenced cluster-wide . Next, we can import the definition into our cluster:
kubectl apply -f clusterissuer.ymlIn order for our Ingress to be able to function as desired, we now need connectivity.
Preparation of the Ingress
If we want to reach our Ingress via the internet and generate a TLS certificate for it, we need a DNS entry. For this in turn, we need the Ingress IP of our cluster. This IP is used by Ingress-NGINX for its cluster service of the type LoadBalancer to route traffic to our cluster.
Creation of a DNS entry
We can output the publicly available IP of the Ingress-NGINX service with the following command:
kubectl get svc -n ingress-nginx ingress-nginx-controller \
-o jsonpath={.status.loadBalancer.ingress[0].ip}For this IP, we now need an A record for a valid (sub)domain with our DNS provider. How exactly this entry can be created differs from provider to provider and is not the focus of this tutorial.
Installation of a demo application
The last missing piece of the puzzle is an application that we can secure and access with our web browsers. We will deploy podinfo, a frequently used demo application with a small web frontend. We will use Helm again for the installation:
helm repo add podinfo https://stefanprodan.github.io/podinfo
helm repo update
helm install --namespace podinfo --create-namespace podinfo podinfo/podinfoAfter a short moment, the application is installed in our cluster, including a ClusterIP service, which we can reference in our Ingress in the next step.
Secure Ingress-NGINX with Cert-Manager
We have finally fulfilled all the necessary requirements and can now create and secure a Ingress in the final step:
apiVersion: networking.k8s.io/v1
kind: Ingress
metadata:
  annotations:
    cert-manager.io/cluster-issuer: letsencrypt-staging
  name: podinfo
  namespace: podinfo
spec:
  ingressClassName: nginx
  rules:
  - host: podinfo.cluster.example.com
    http:
      paths:
      - pathType: Prefix
        path: /
        backend:
          service:
            name: podinfo
            port:
              number: 9898
  tls: # < placing a host in the TLS config will determine what ends up in the cert's subjectAltNames
  - hosts:
    - podinfo.cluster.example.com
secretName: podinfo1-tlsA few points stand out:
- we create the
Ingressin the sameNamespacein which we have installed podinfo - we add an annotation that instructs Cert-Manager to use our previously created
ClusterIssuerfor certificate generation - our
Ingresswill forward requests to https://podinfo.cluster.example.com/ to our podinfo service - In addition, we define a host name for the SAN entry of our certificate and a name for the certificate itself
We can import this configuration into our cluster:
kubectl apply -f ingress.yml- Cert-Manager reads the annotation of our
Ingressand…- …created another temporary
Ingressfor the HTTP01-Challenge - …the requested
Certificatecreated as CRD - …created the corresponding secret podinfo1-tls for our
Ingress
- …created another temporary
- Ingress-NGINX links the
Ingressobject with the public IP.
Once all these points have been completed, we can access https://podinfo.cluster.example.com in our web browsers – and are greeted by the familiar message “Your Connection is not secure”.
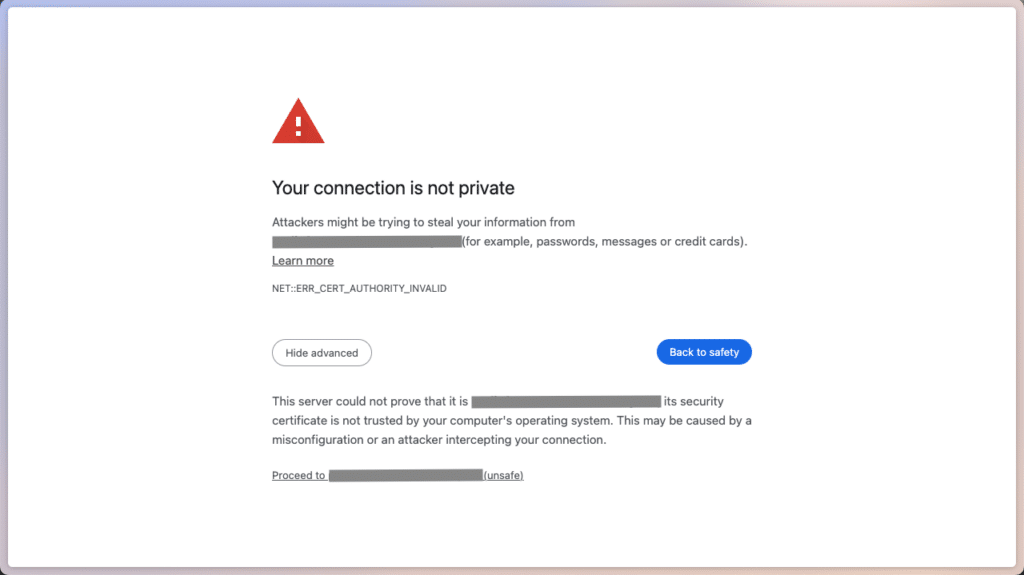
This happens because we have configured Let’s Encrypt’s Staging API as Certificate Authority. If we click on Show advanced and confirm with Proceed to https://podinfo.cluster.example.com/, we will still be redirected to podinfo:
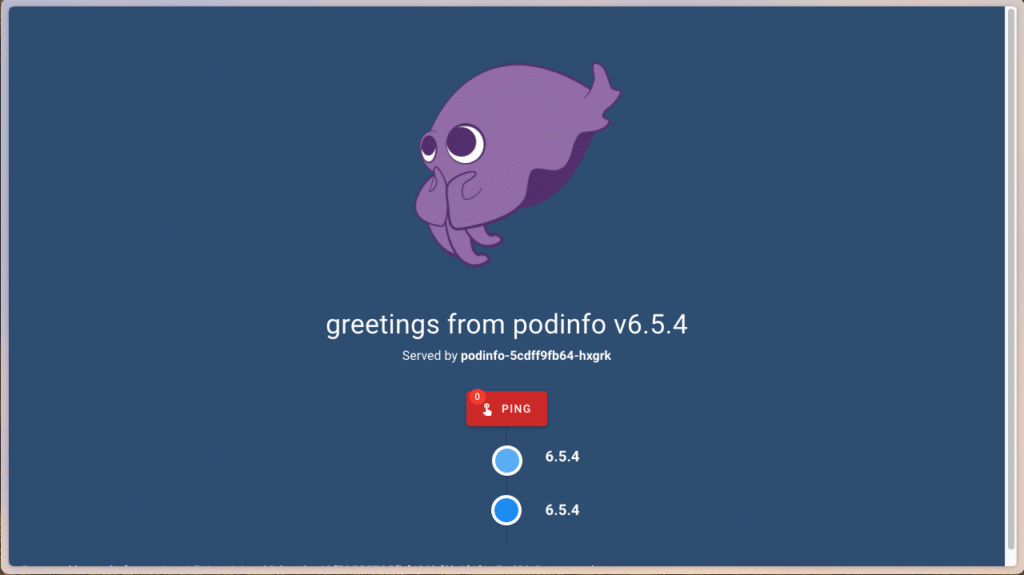
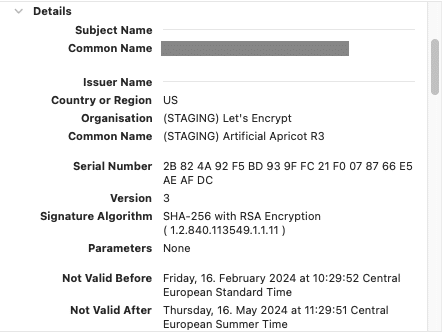
It works! Podinfo’s mascot applauds us for the correct configuration of our Ingress and ClusterIssuer. For the sake of completeness, we can also verify in the certificate details of our web browser that the requested certificate was created by Cert-Manager:
Summary
Done – we have secured our Ingress-NGINX with Cert-Manager! All we needed was a ClusterIssuer that uses Let’s Encrypt’s (Staging) API and a corresponding annotation in our Ingress object.
If you want to experiment further, you can use Let’s Encrypt’s Production API as the next step by removing the staging part from the configured URL of ClusterIssuer. Then your web browser should no longer complain that the certificate is not trustworthy.
If you are already deploying other applications with Helm, it is also possible that there are already predefined values or built-in Cert Manager support for your application(s) – just take a look! And if the tutorial was a little too quick or certain points are still unclear, don’t hesitate to call our MyEngineers® – they’re always happy to help!


0 Comments