

Would you like to set your own limit for incoming connections to your load balancer? In this tutorial you will learn how to do this.
About the connection limit
The connection limit describes the maximum number of connections per second that are permitted for a load balancer listener (open frontend port). You may be asking yourself, why should you set a connection limit at all? The most obvious reason is to prevent a flood of HTTP requests to the Kubernetes apps. With a stronger limit, the excess connections are rejected, preventing the cluster’s capacity from being overloaded. If you have already taken precautions in your cluster for such cases and can compensate for a flood of requests using autoscaling, for example, it is of course also possible to further increase the connection limit on the load balancer.
Problems with high connection limits
In earlier versions of our load balancer service “Octavia”, the number of permitted connections was not limited. However, under certain circumstances this led to problems with the load balancers. If more than three listeners are configured on the load balancer and no connection limit is set, this causes the HAProxy processes of the load balancer to crash. The problem is described in more detail in this bug report. To prevent our customers from running into this problem, we have decided to set the default connection limit to 50000 connections. This tutorial shows you how to adjust the limit yourself.
Service annotations for load balancers
Since the Kubernetes clusters from NWS are operated in our OpenStack Cloud, the interaction between Kubernetes and OpenStack is realized via the “Cloud Provider OpenStack”. In the documentation of the provider you will find a section that contains all available Kubernetes service annotations for load balancers. The annotation we need to be able to set a user-defined connection limit is “loadbalancer.openstack.org/connection-limit”.
Setting the annotation
The annotation is set in the Kubernetes cluster on a service object of the load balancer. You should find a service of the type “LoadBalancer” in your service list.
kubectl get service
NAME                                 TYPE           CLUSTER-IP       EXTERNAL-IP       PORT(S)                      AGE
ingress-nginx-controller             LoadBalancer   10.254.194.107   193.111.222.333   80:30919/TCP,443:32016/TCP   2d
ingress-nginx-controller-admission   ClusterIP      10.254.36.121    <none>            443/TCP                      2d
kubernetes                           ClusterIP      10.254.0.1       <none>            443/TCP                      2d17h
my-k8s-app ClusterIP 10.254.192.193 <none> 80/TCP 47hIn my example, the service was set up automatically when I installed an Nginx Ingress Controller via Helm. I can simply edit the service and add the desired annotation:
kubectl edit service ingress-nginx-controllerNow set the annotation for the connection limit to the desired value (in the example “100000”):
apiVersion: v1
kind: Service
metadata:
  annotations:
    loadbalancer.openstack.org/connection-limit: "100000"
    meta.helm.sh/release-name: ingress-nginx
    meta.helm.sh/release-namespace: default
  creationTimestamp: "2021-09-08T08:40:59Z"
...Save the changes and then exit editor mode. The following message is displayed as confirmation:
service/ingress-nginx-controller edited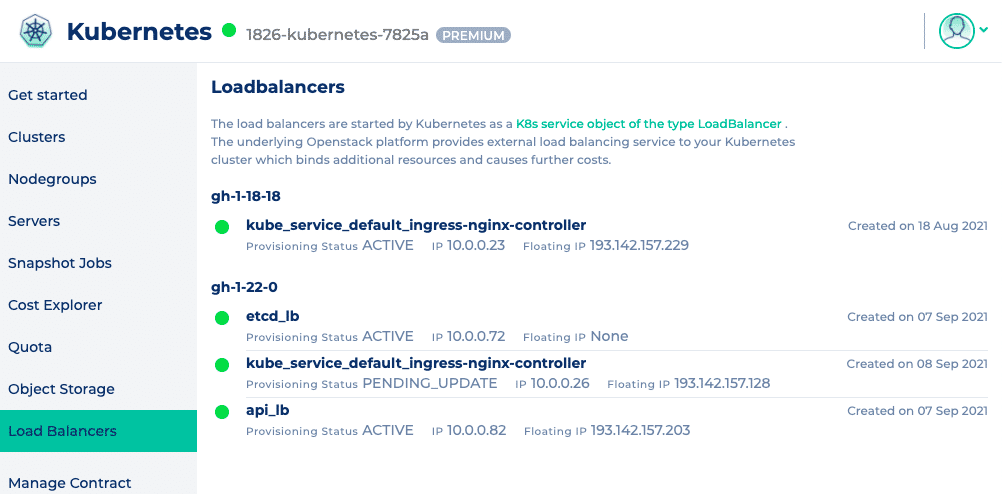
If not, you should check whether you have a typing error in the annotation and whether the desired value is also set in double quotation marks. Once the service has been successfully customized, it usually takes 10 to 15 seconds for the changes to be applied to the OpenStack load balancer. You can check the status of your load balancer in the NWS web interface. The “Provisioning Status” is set to PENDING_UPDATE while the changes are being made and changes back to ACTIVE as soon as they have been completed.
Conclusion
In certain cases, it can be useful to set a user-defined connection limit on a load balancer and, as we have just seen, this is fairly easy to implement. However, it should be noted that very high limits in combination with a large number of listeners can still lead to problems.


0 Comments